
• We are STAs
    • Abdurrahmaan Baghdadi
    • Asha Rountree
    • Cindy Truong
    • Haley Ma
    • Isabella Melendez Gonzalez
    • Julie Brandt
    • Kate Shih
    • Kodi Khiraoui
    • Kyra Lee
    • Nicholas Peasley
    • Sasha Kenney
    • Shanda Horm
    • Shriya Atreya
    • Tomas Marulanda-Mesa
    • Trisha Darure
  • We were STAs
  • STA Presentation
    • STA Presentation 2017
    • STA Presentation 2016
  • Testimonials
  • Resources
  • Home

STA Blog

Abdurrahmaan

Abdurrahmaan

Blog 1 Entry: Introduction to WordPress and Airtables

November 4, 2026 By Abdurrahmaan

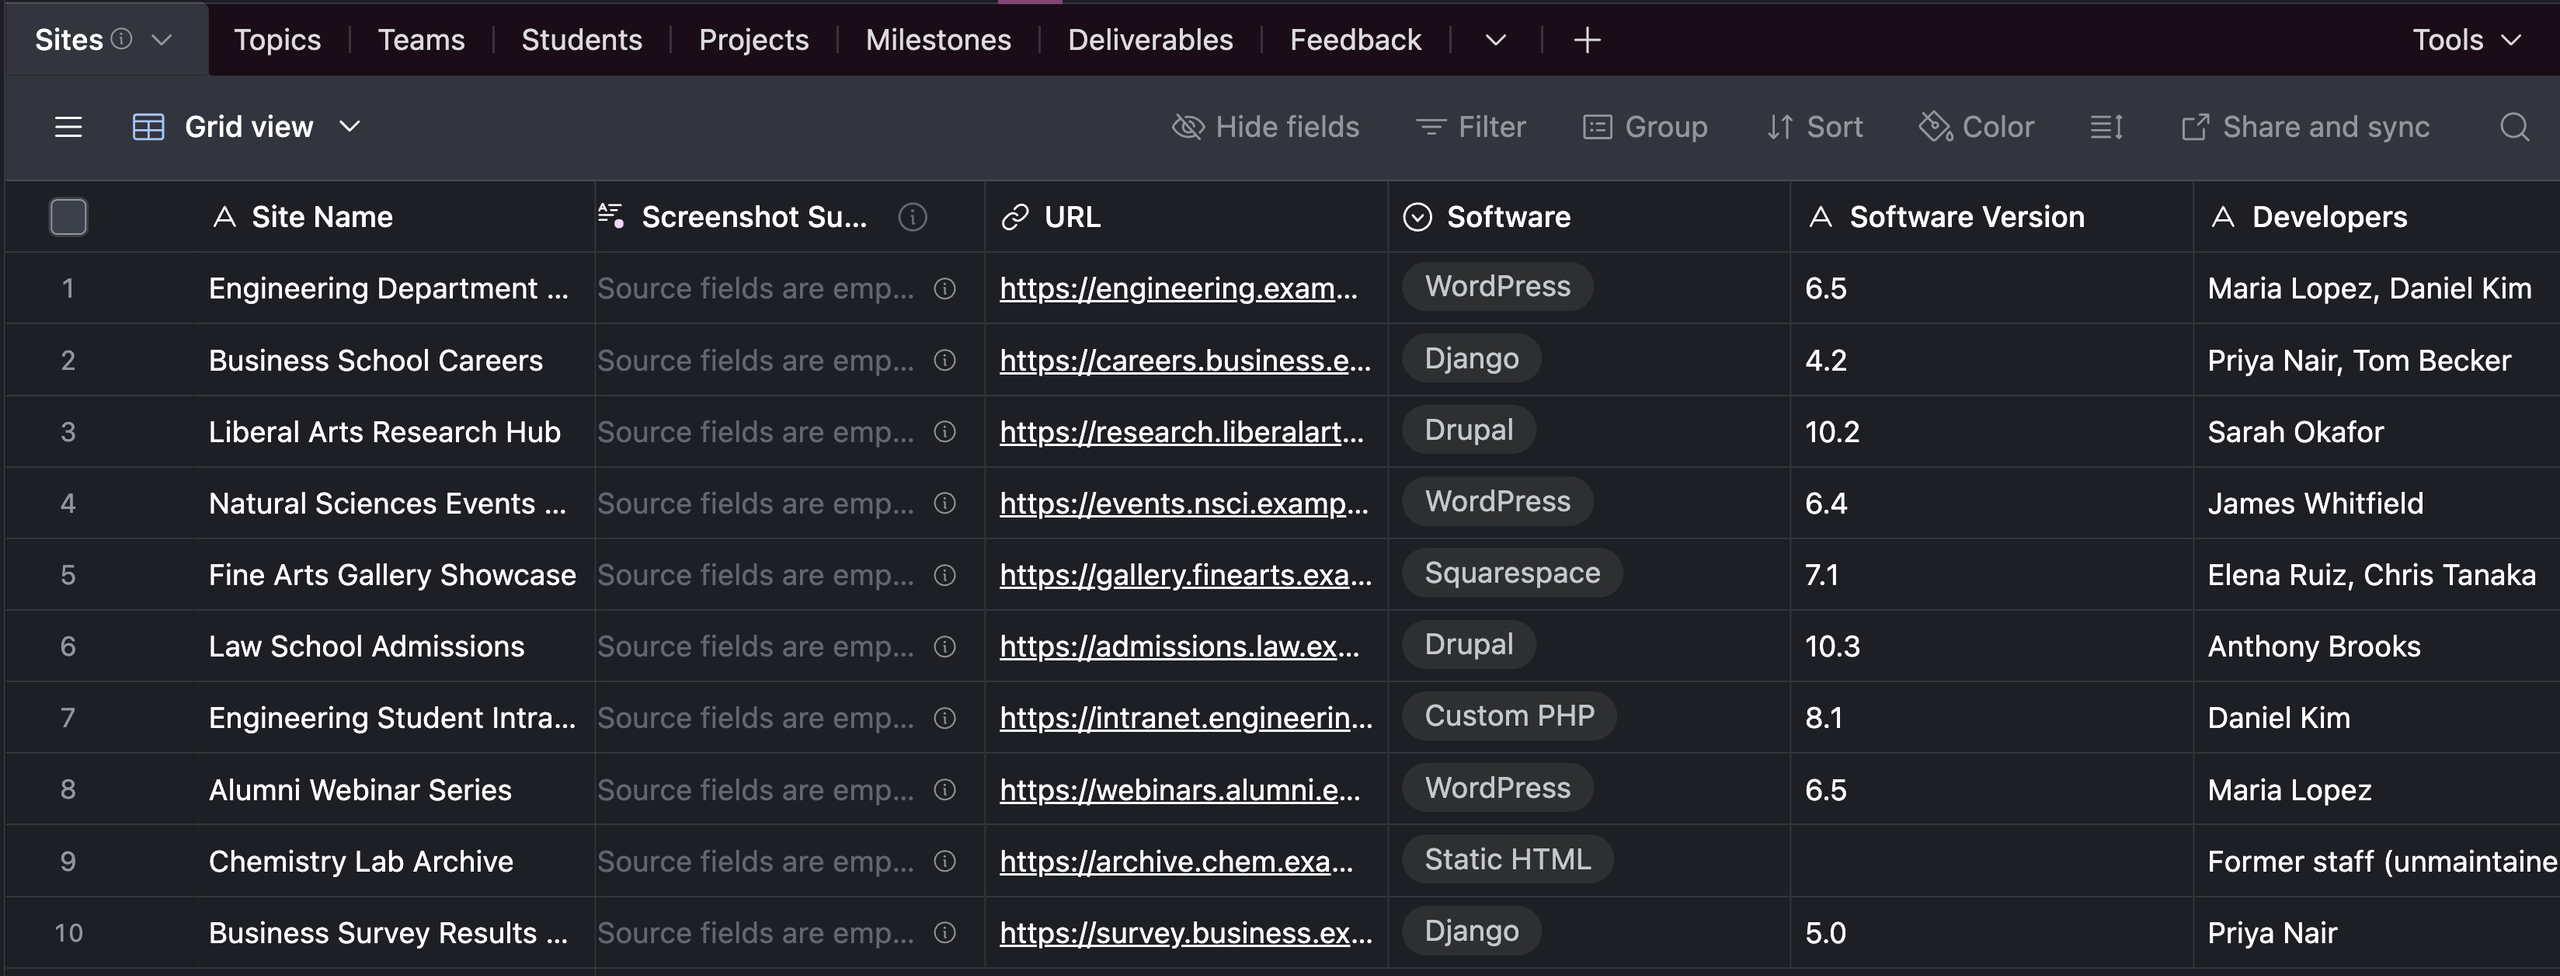
Day one as an STA at LAITS, I was introduced to a software known as Airtables: In Airtables, we are able to see all the sites hosted by LAITS, their associated frameworks, versions developers and the links to them (Note: for the purposes of the post I have recreated demo data following the format)
  • The next area of work was to explore wordpress. Coming from a background of computer science, I had familiarity with the function and operations of php sites and was given the task to self host a wordpress site, as a way to explore functionality and understand the inner workings of wordpress.
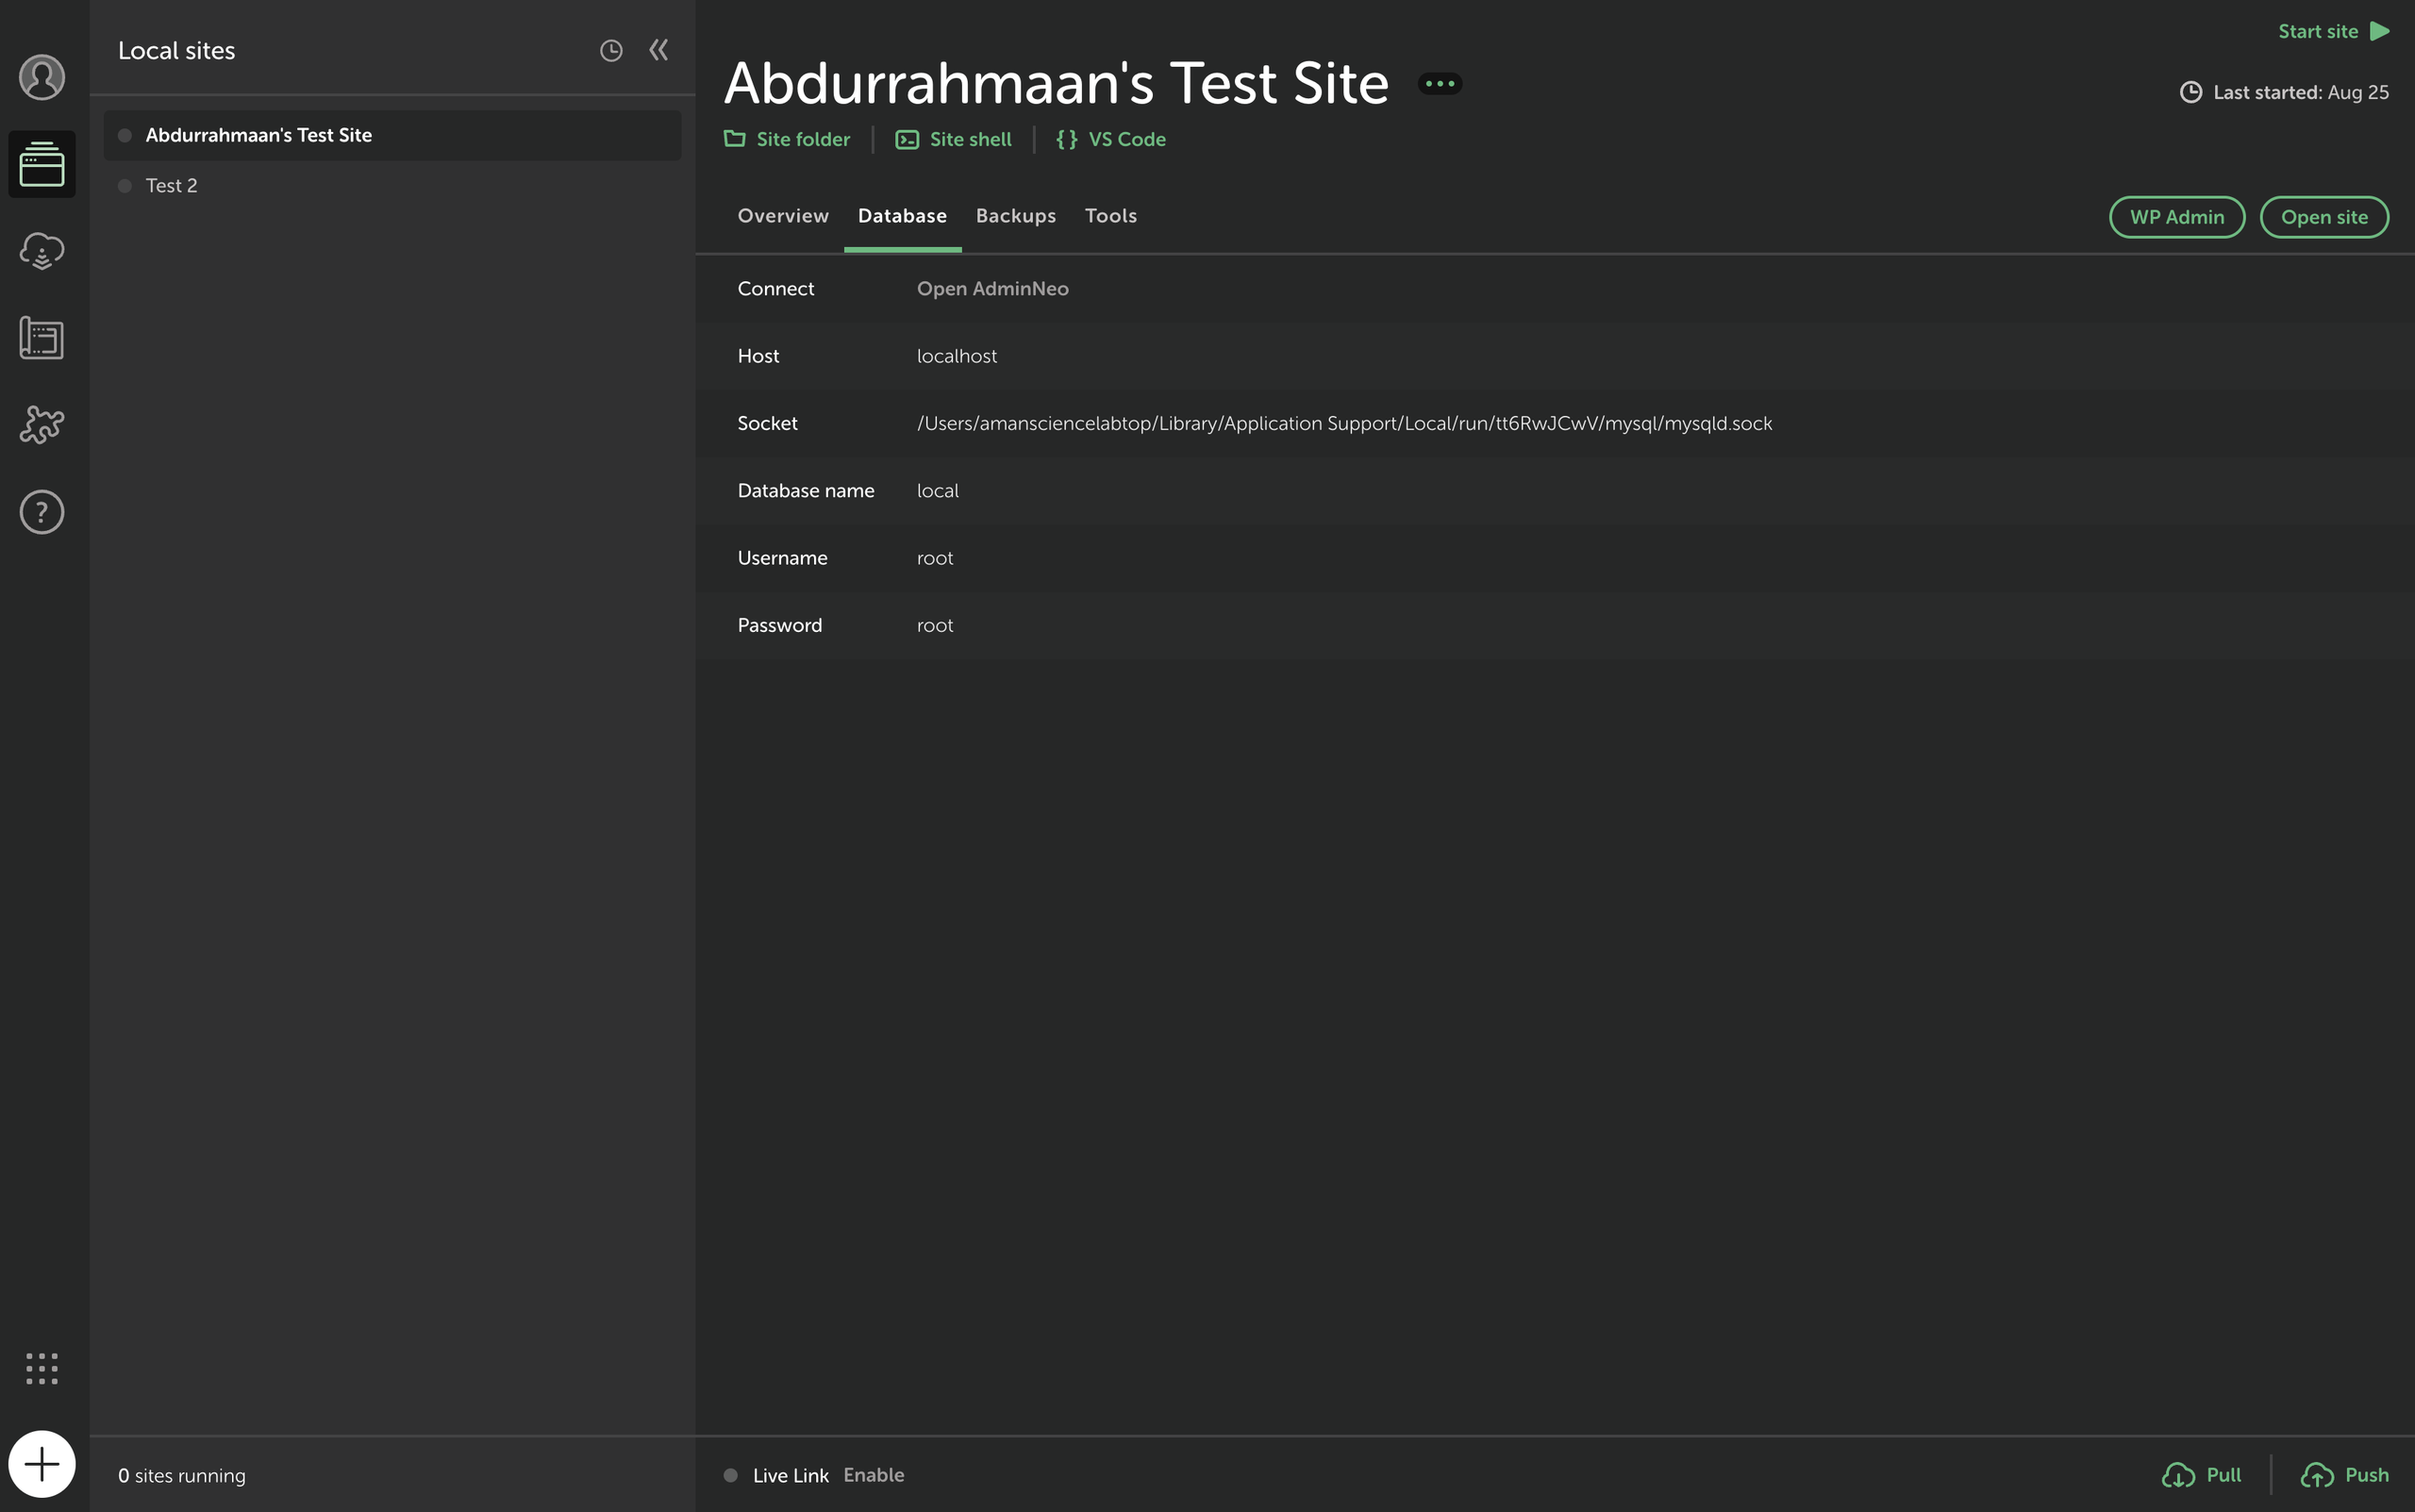
  • Below you can see how I actually opened my self hosted site through a software called local that shows local sites and their associated databases:
  • WordPress is programmed through a language known as php
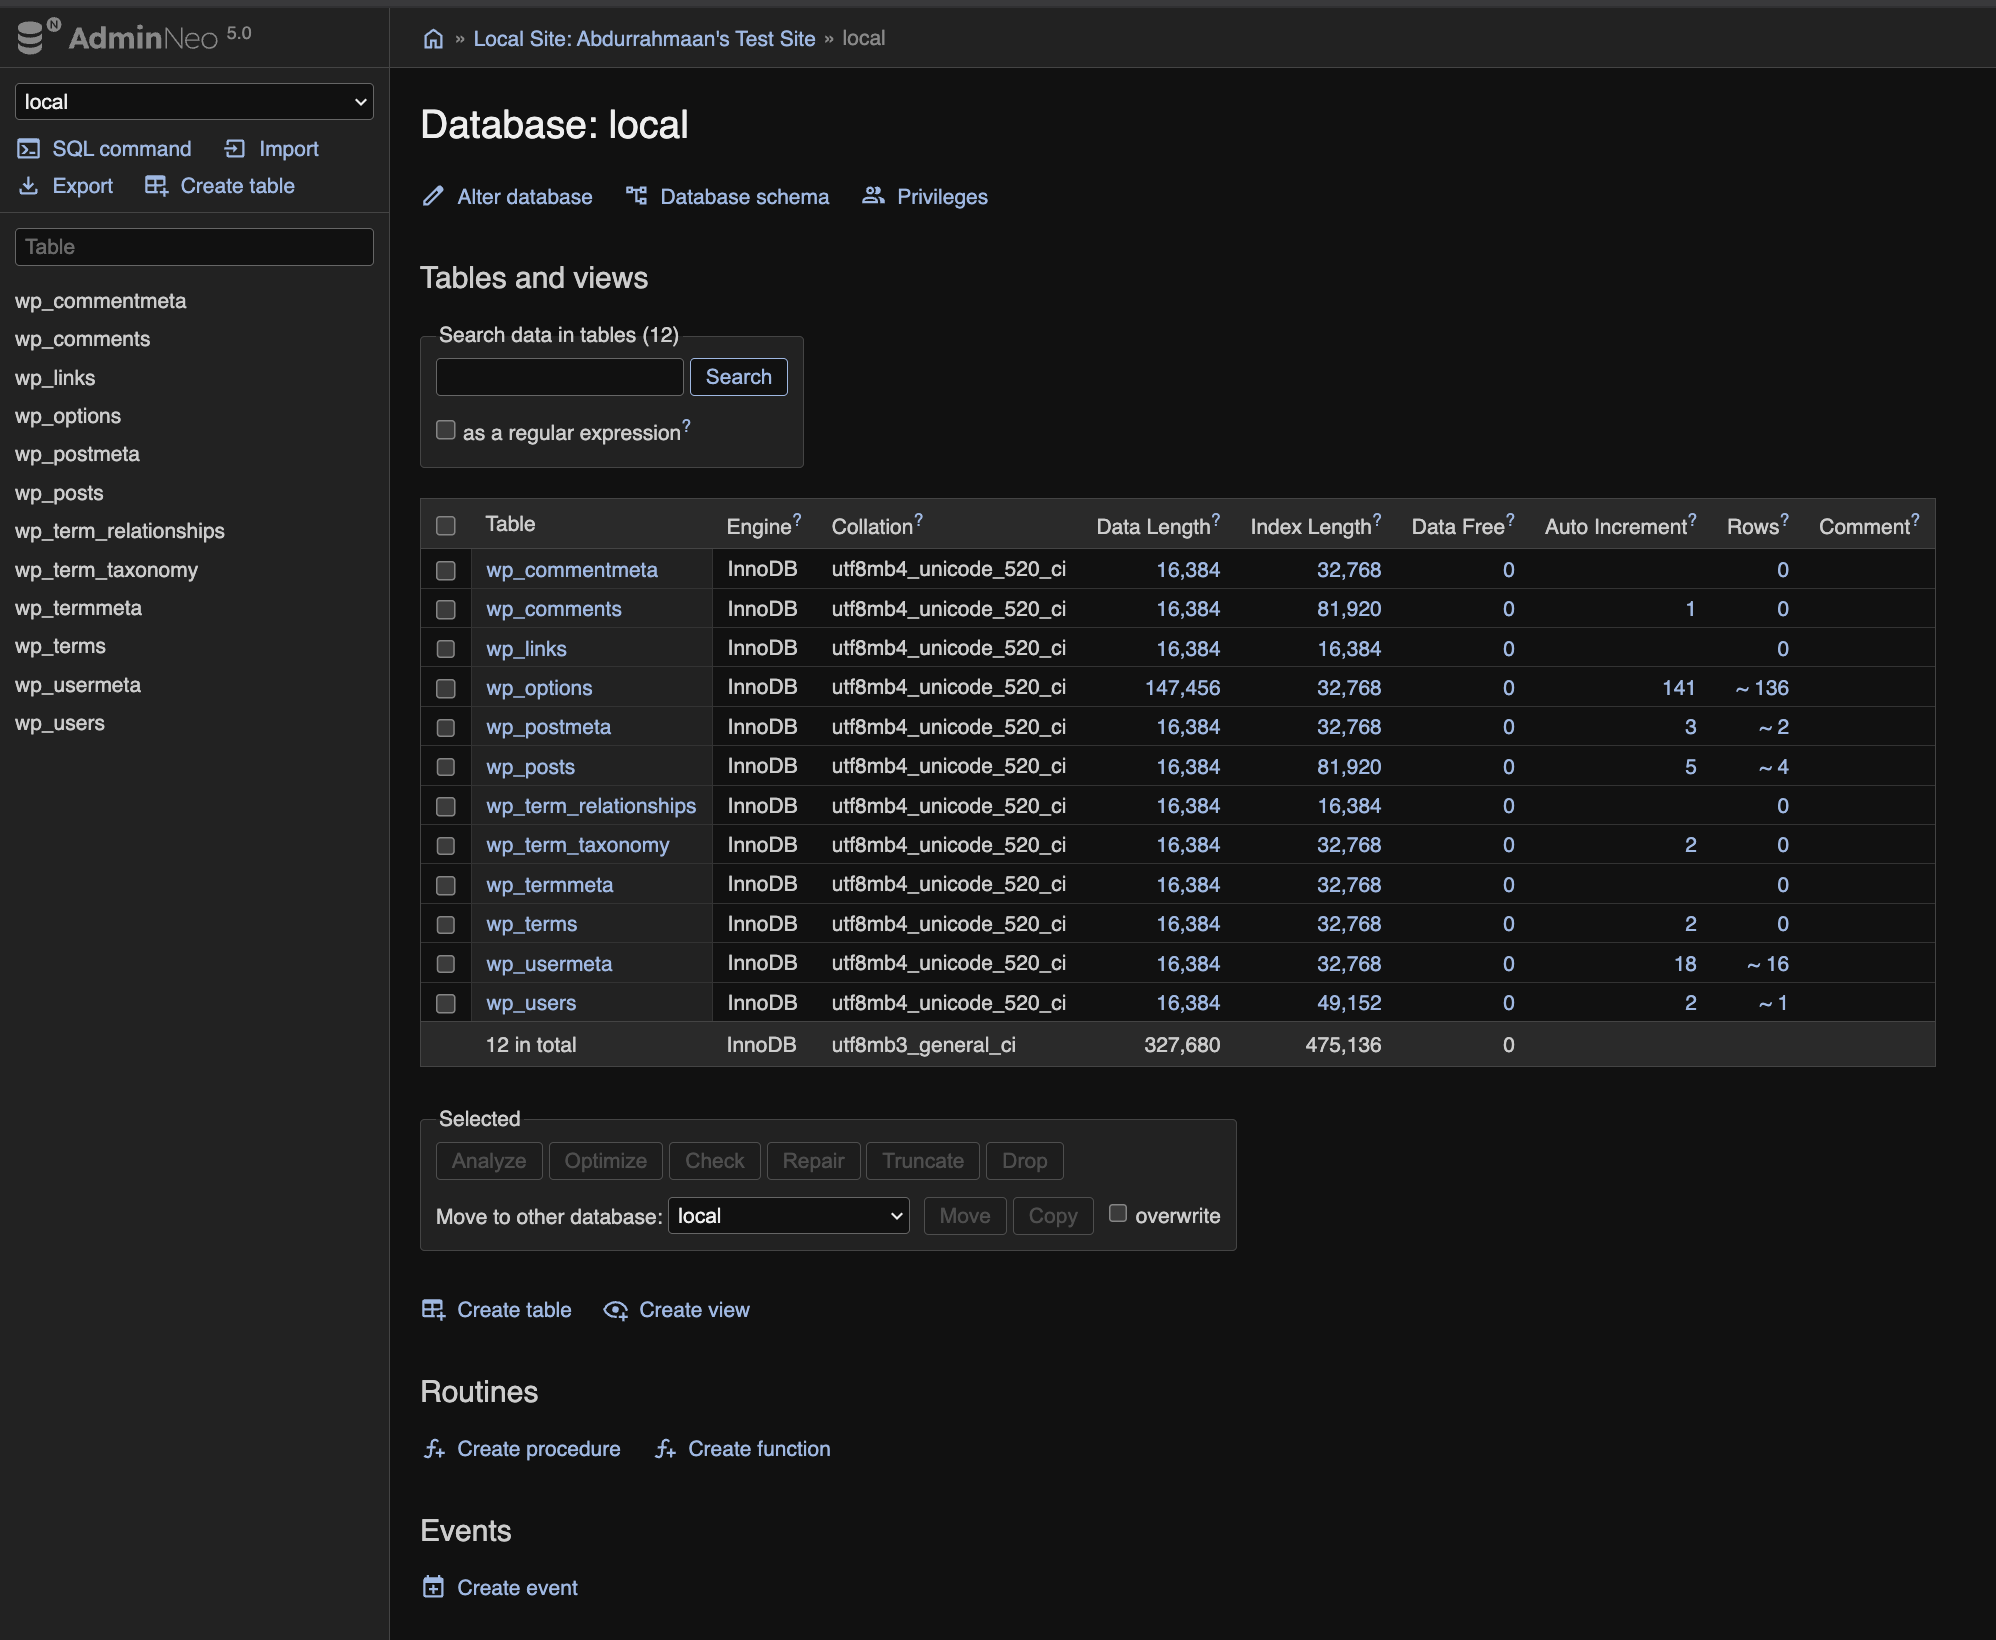
  • Most sites (not exclusively wordpress) have a database. A database is an efficient storage of information for organization, management, storage, and retrieval.
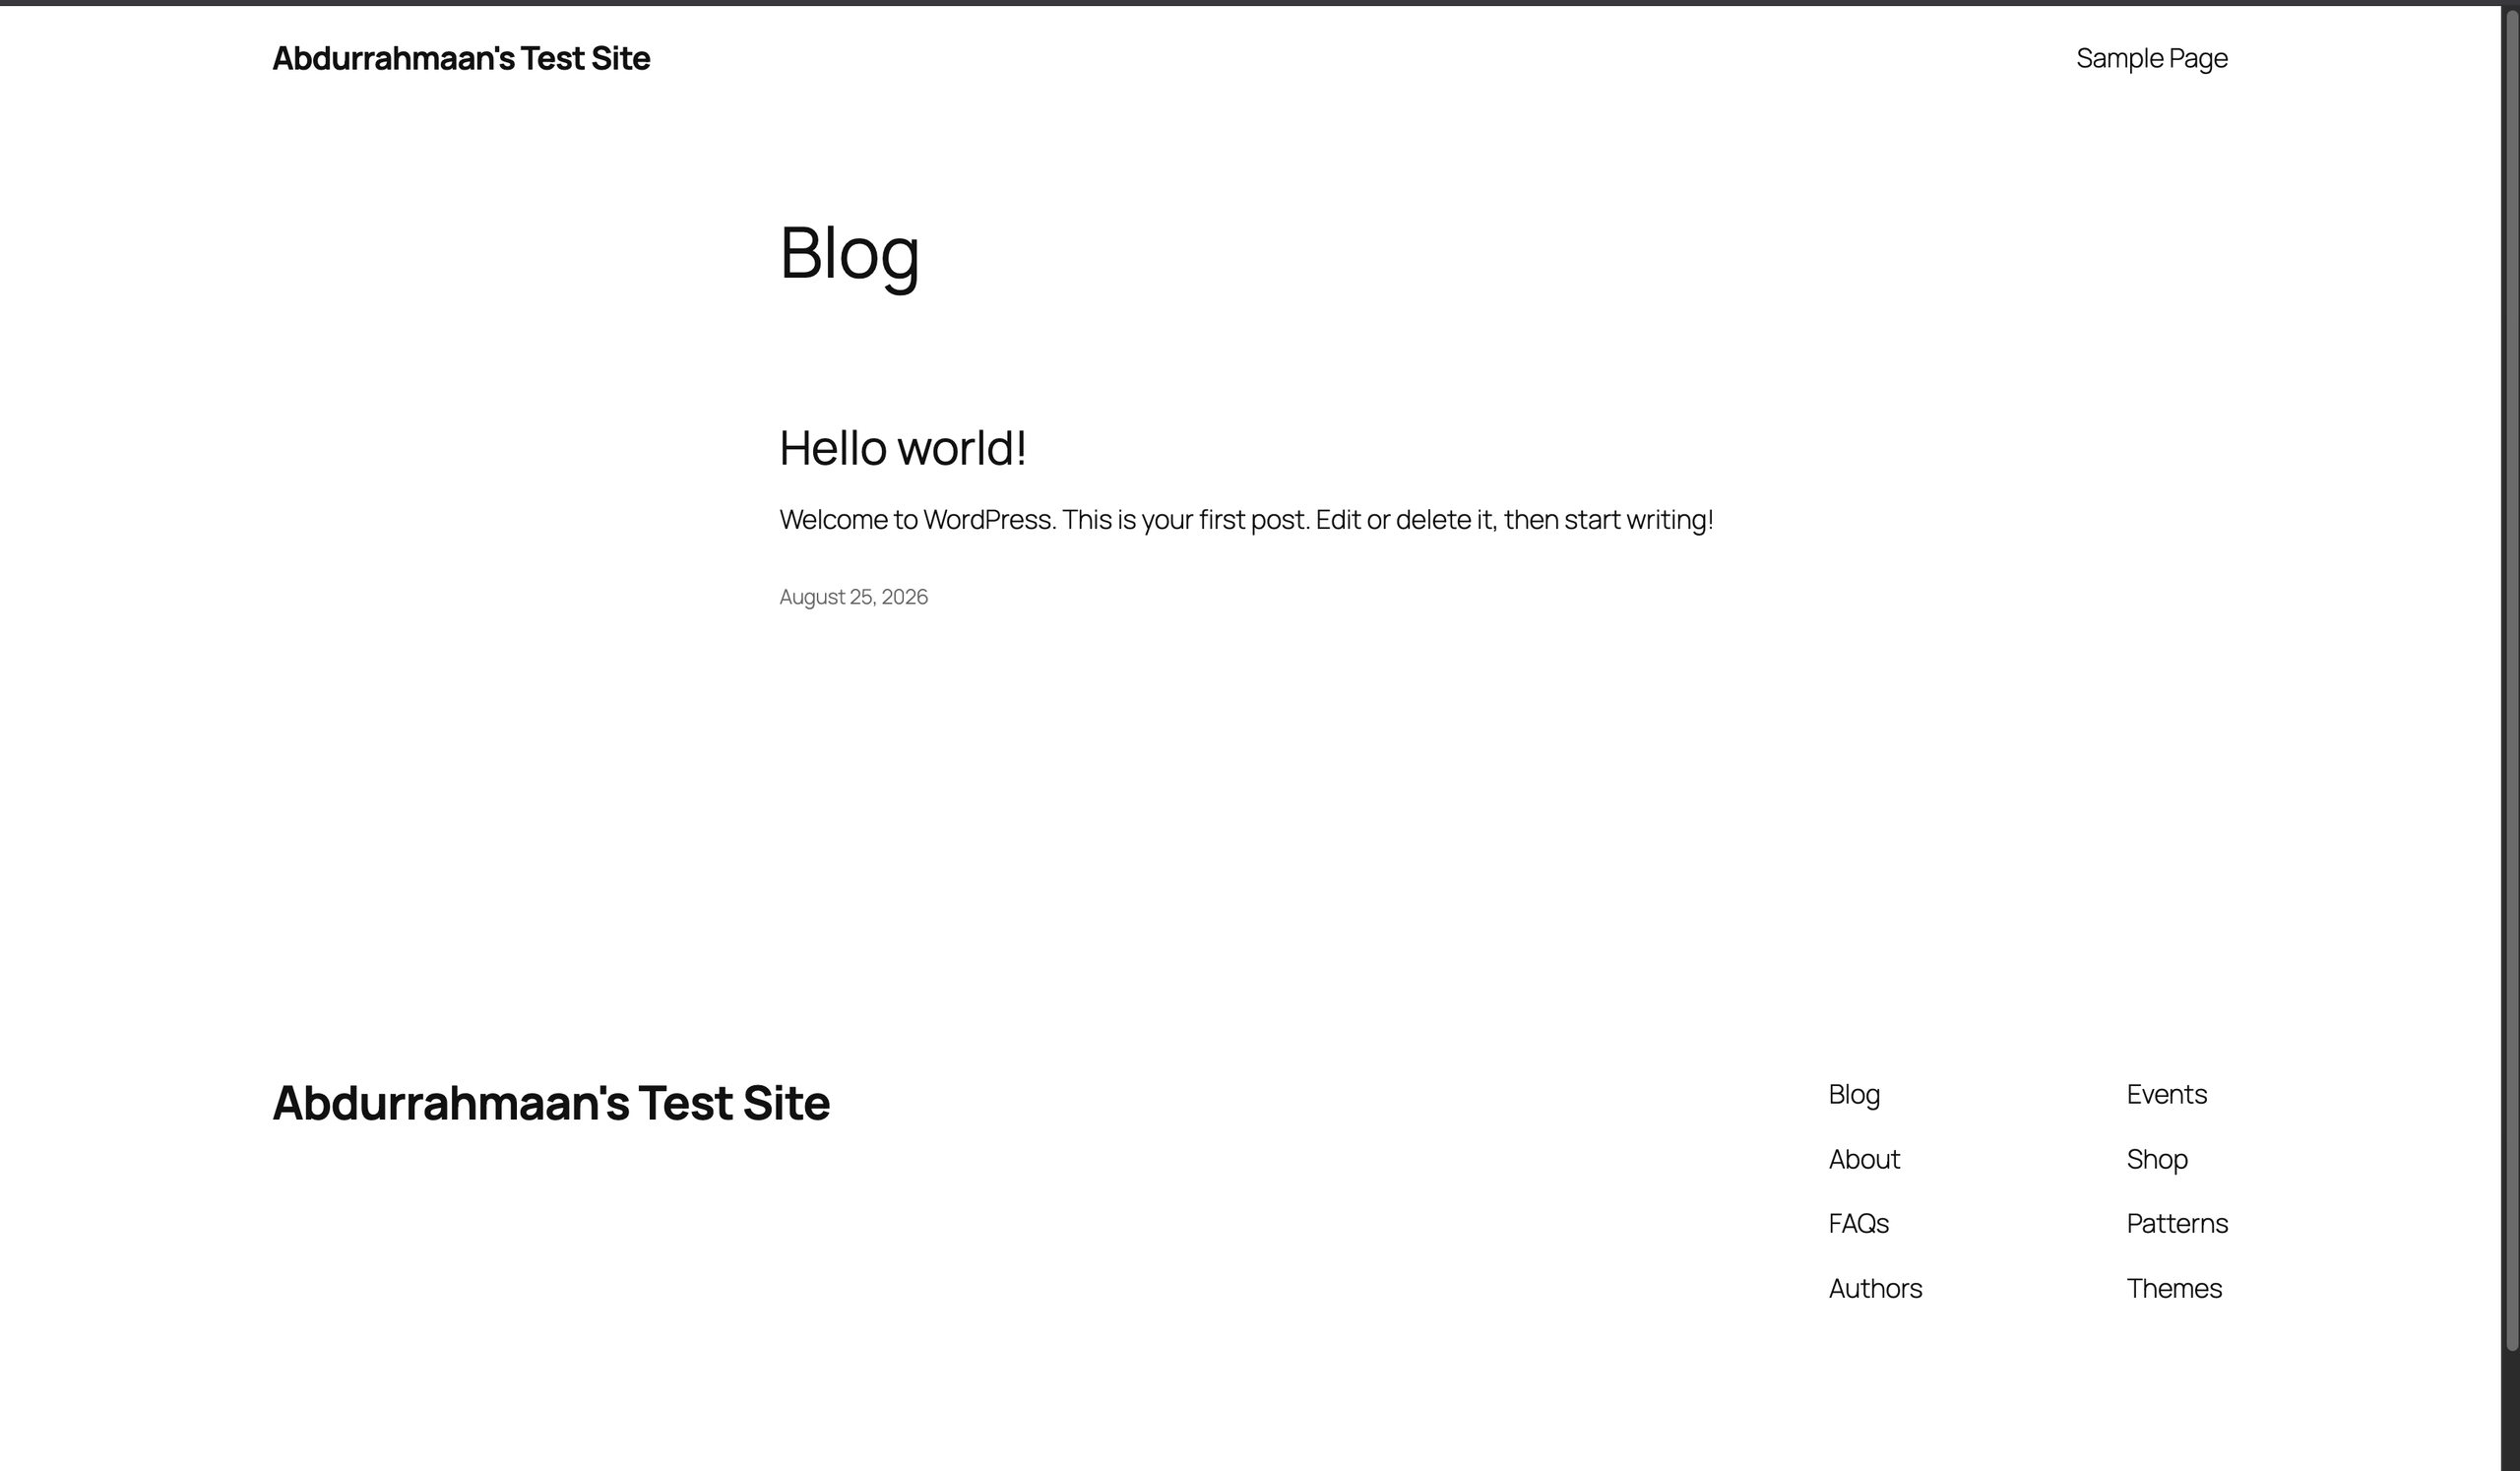
  • Below we can see the Database for the self hosted wordpress site and how it translates to the actual website:
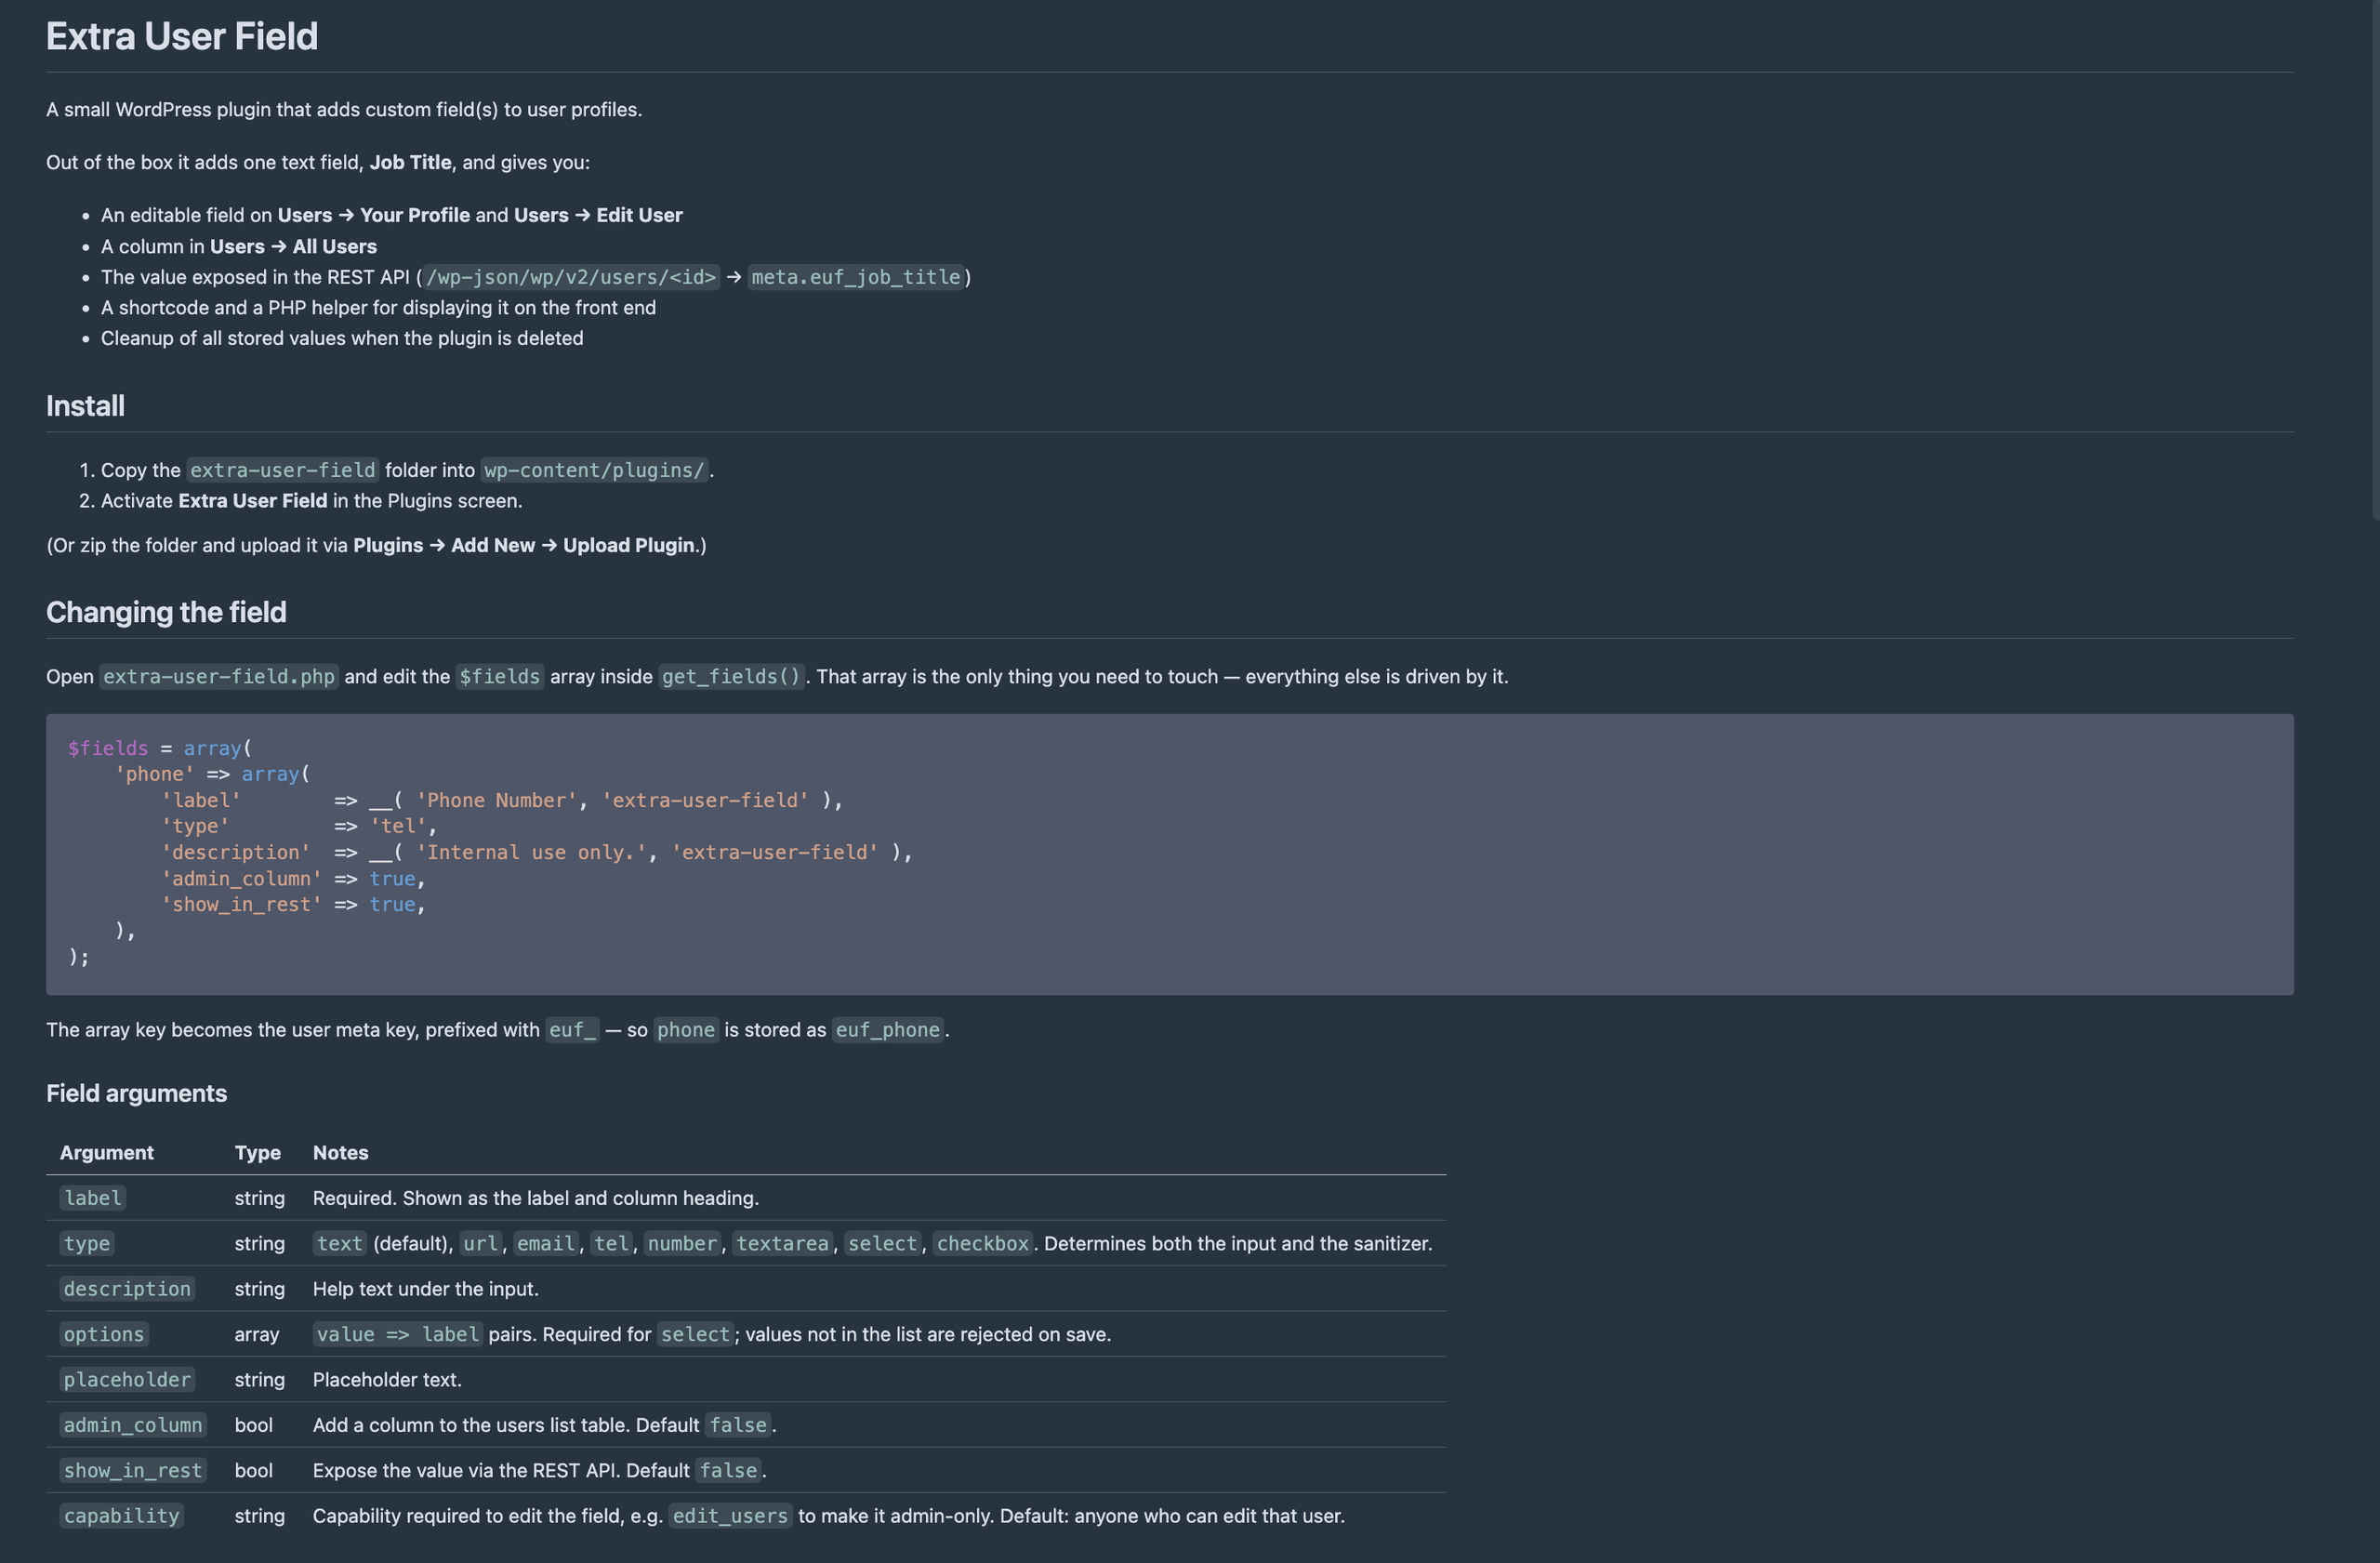
Below is an example of the Readme for the self hosted Sites on how to interact with users (opened in the VScode IDE):
Here is an example of how that is seen in a database:
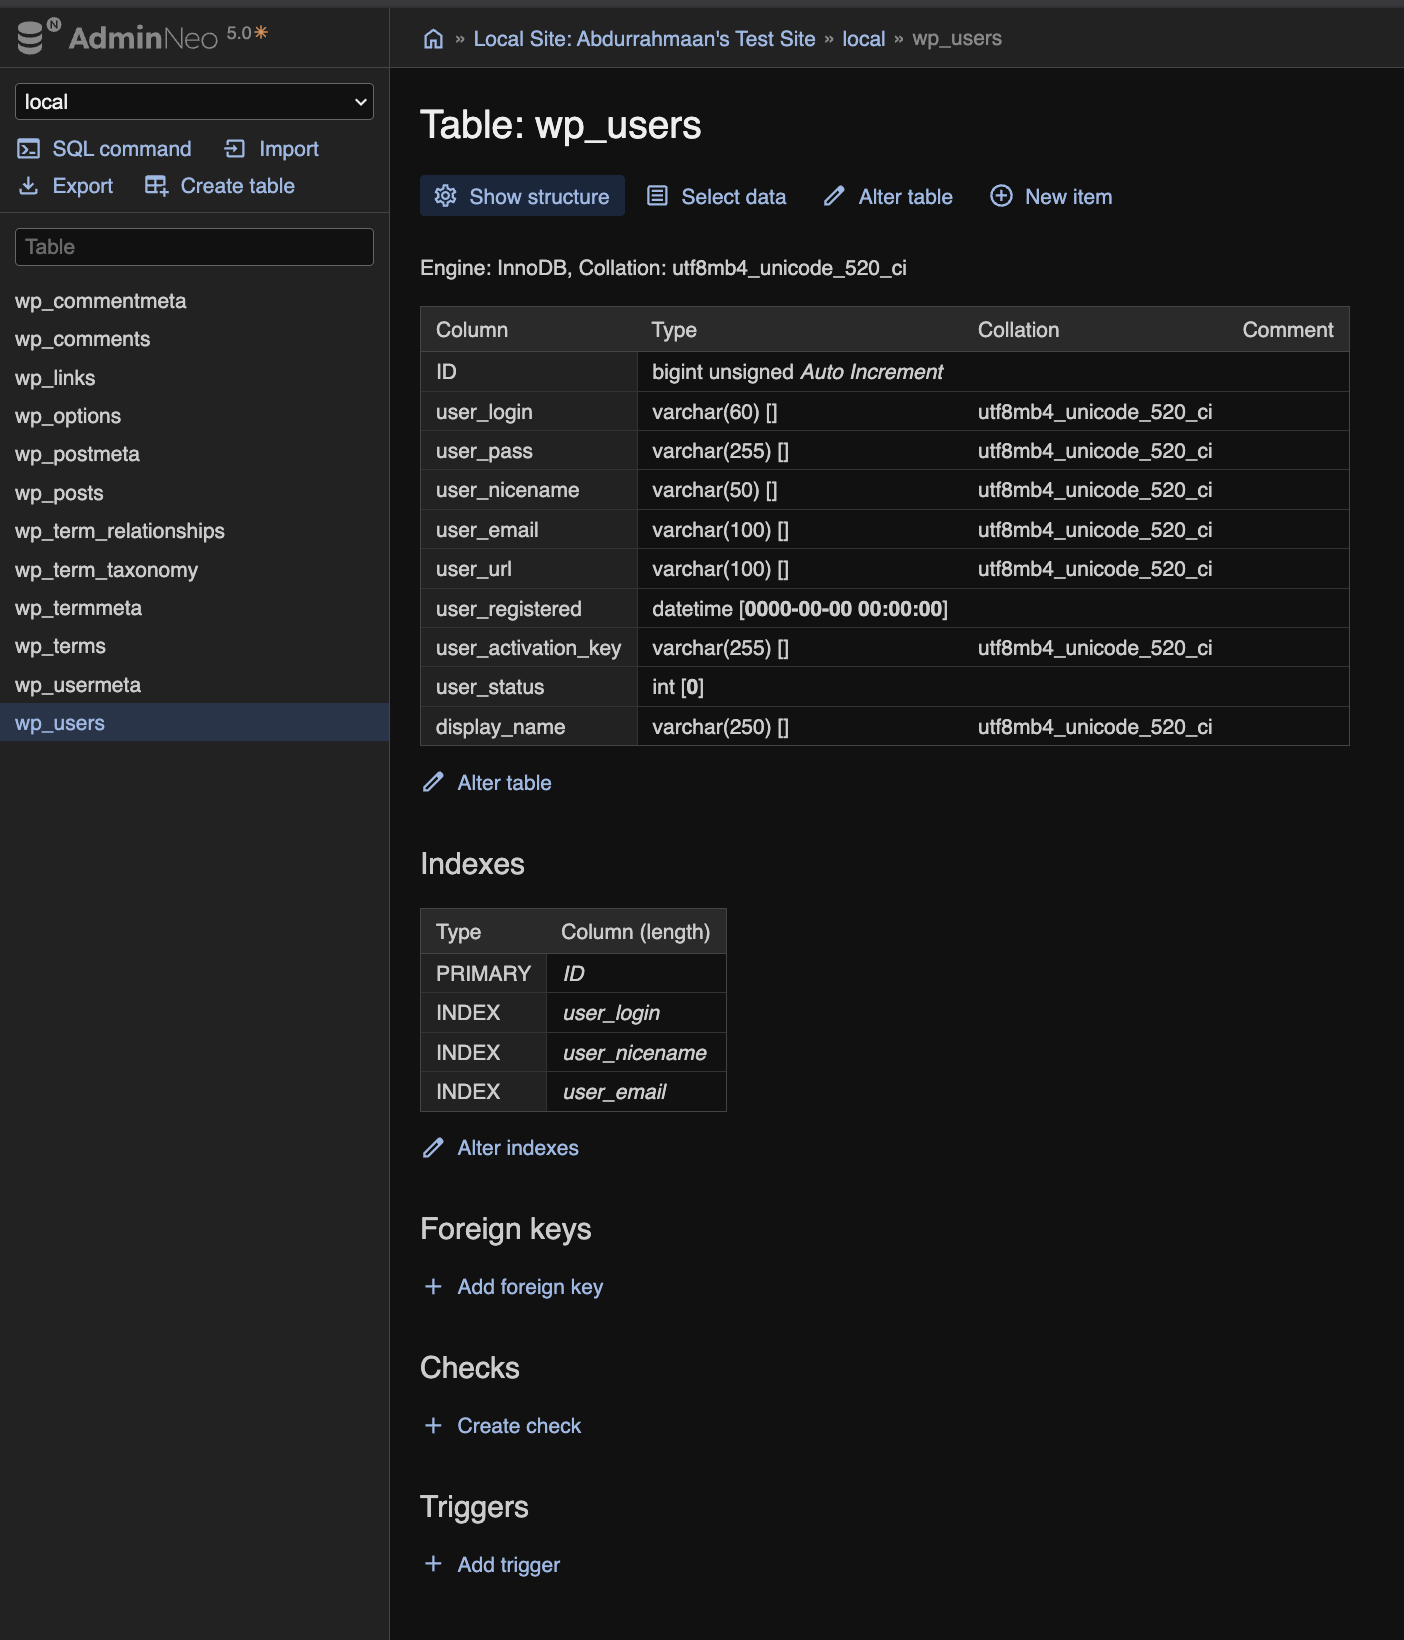
There a couple of important items to take a look at in regards to databases, we see here foreign keys, indexes, and triggers

In my example I did not implement any of these, but the idea is that there is a set of tables in a database that interconnect in a schema known as an Entity Relationship Diagram (ERD)

Example below:
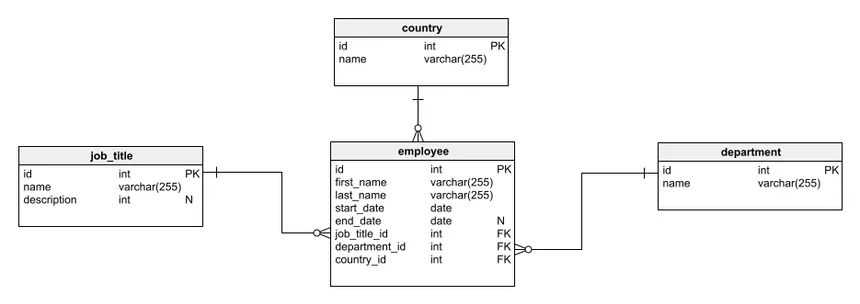
Credit: https://www.red-gate.com/blog/schema-diagram/

There are 3 different relationships/ways a database can interconnect based on each datapoint:

  • one-to-one
  • one-to-many
  • many-to-many

foreign keys:

Foreign keys are columns in a database that reference the head of another table indicating a connection between the two tables within the database

Indexes:

Indexes are a selection of values in a database that are stored in a smaller list for quick access, this can be done with specific data structures to increase the speed and efficiency of referencing common elements in a database

Triggers:

Any interaction that causes changes in long term data causes a process to run in the database the core of these operations is referenced as CRUD

  • CREATE
  • READ
  • UPDATE
  • DELETE

The significant purpose is to set protocols that occur in reaction to these operations in order to maintain a database

Ex.

1. DDL Triggers 

Data Definition Language (DDL) triggers run when commands like CREATE, ALTER or DROP are used. They help track or stop changes to the database structure, such as creating, modifying or deleting tables.

Example: Prevent Table Deletions

CREATE TRIGGER prevent_table_creation
ON DATABASE
FOR CREATE_TABLE, ALTER_TABLE, DROP_TABLE
AS
BEGIN
PRINT 'you can not create, drop and alter table in this database';
ROLLBACK;
END;

Automatically Updating Related Tables (DML Trigger Example)

Triggers can automatically perform tasks when data changes in a table. For example, in a student database, when a student’s grades are updated, the total score should also be updated automatically.

CREATE TRIGGER update_student_score
AFTER UPDATE ON student_grades
FOR EACH ROW
BEGIN
UPDATE total_scores
SET score = score + :new.grade
WHERE student_id = :new.student_id;
END;

credit: https://www.geeksforgeeks.org/sql/sql-trigger-student-database/

Content Management System

  • The next Large part of wordpress sites is the content management system (CMS) interface for the site. 
  • Below is a picture of the dashboard for the labs multisite at LAITS:
  • Here we can interact with users, sites, themes, plugins
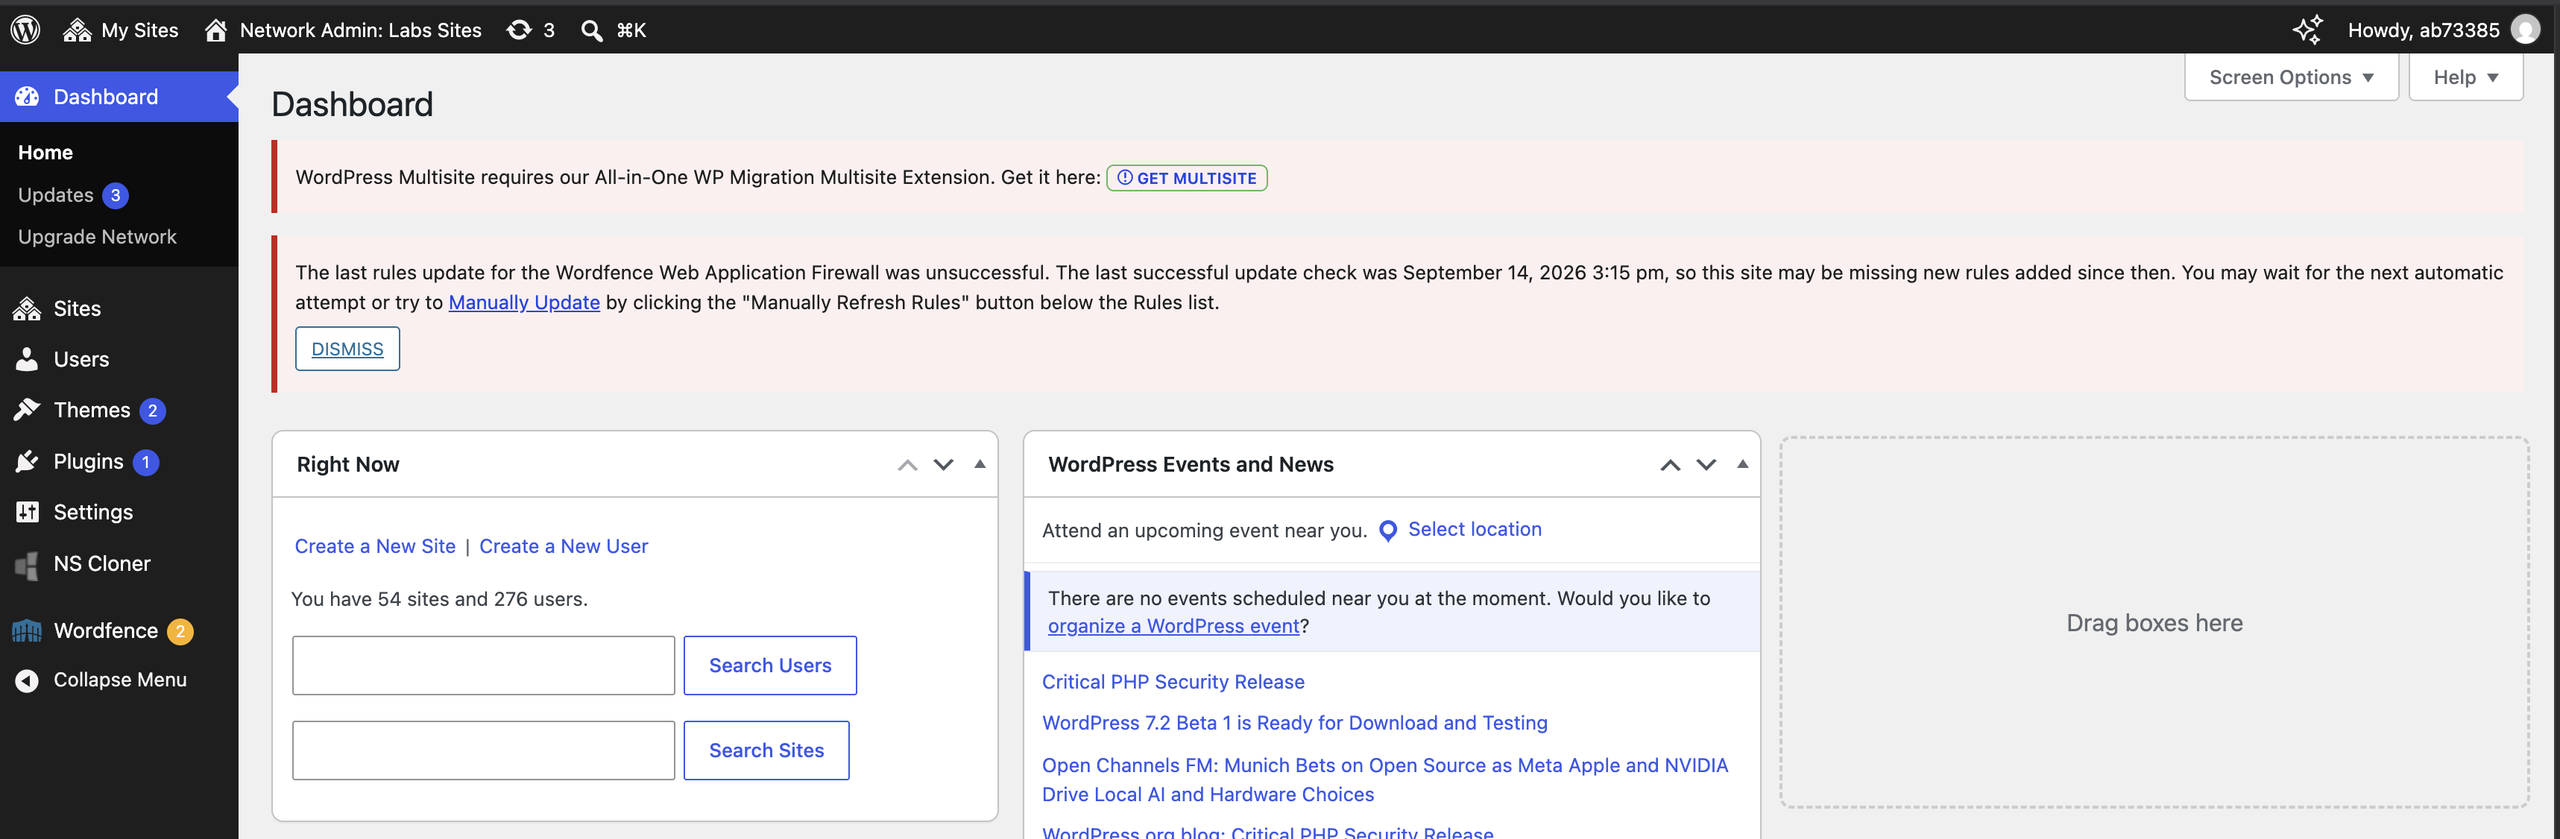
Themes:

Templates that can be edited to interact with the way a site looks. The way it is displayed and its default visual behavior.

Plugins:

Add-ons to WordPress sites that can add to or change WordPress functionality

Filed Under: Fall 2026 – Spring 2027

Welcome to the STA Blog!

September 1, 2026 By Abdurrahmaan

Hi Abdurrahmaan! Welcome to the STA Blog! This the page where your blog posts will published.

Toward the end of your STA Orientation, you’ll design and upload a banner to go at the top of this page.

Upload a Blog Banner


Step One: Design Your Banner in Photoshop

Use these Photoshop specs when you’re making your banner:

    • Your banner should be 780 pixels wide (the height doesn’t matter)
    • Must include your name, your major, and your expected graduation year
    • Your banner should reflect who you are (your personality, interests or major)
    • Make sure to save your banner for the web (i.e. File > Export > Save for Web (Legacy))
    • If you save your banner as a JPG, make sure sure the quality is high (i.e. at least 60)

Step Two: Save Your Banner

  • There are two places you can save your completed projects: UT Box and the LAITS server. You’ll be given a personal folder in both locations. For now, you only have to save your banner to UT Box, but you may have to access the server at some point in the future.

Accessing UT Box

    • If you haven’t already registered with Duo, follow the instructions here to set up an account.
    • Then log in to UT Box with your EID and password: http://utexas.box.com/
    • Go to the folder called Design-Coding-STAs, then the subfolder STA-folders
    • Find the folder with your name on it
    • Save your banner both as an image and an unmerged PSD

Step Three: Upload Your Banner to the STA Blog

  • Log in the the STA Blog here. You should’ve received an email confirming your new WordPress account with your username and assigned password. If didn’t get it or you can’t log in, ask De’sha or another STA.
  • You’ll be able to change your password anytime by going to Users > Your Profile > Account Management > New Password.

Uploading media and banners in WP

  • Read these links before you upload your banner.
  • They will walk you through how to upload media to your blog.

How to Upload a Homepage Banner

Adding New Posts and Media

Make Your First Blog post


  • Reflect on the day. You blog posts will be a documented experience of your time as an STA with LAITS. They can include anything you want to share about the projects you’re working on, and the more media (screenshots, images, links, videos, gifs) you can use, the better.
  • For today, write a bit about about yourself and what you did during orientation.
  • If you haven’t already, upload your banner.

Things to Remember


Image Specs

  • You should never copy and paste images into to your blog. Always upload images into the media section of blog first (Click on the add media button), then insert the image from the media folder to display on your blog.
  • Don’t use the thumbnail version of your images.
  • Use images that are 72 dpi
  • Screenshots are fine
  • Images that are 780 pix wide format nicely above or below text blocks

Always Categorize Your Posts

  • Always check the category “Fall 2026 – Spring 2027” on the blog posts you make this summer. This is the only category you need to check.
  • Make sure your posts are categorized correctly so that all of your work is documented in the correct semesters.

Commenting on Basecamp

Notification comments: etiquette, files, questions, feedback

Let us know when you’ve completed this task by adding a link to your blog to a comment in Basecamp.

Notes for all comments in Basecamp:

  • *Always address the person/people you are writing to by their names.
  • *Always use complete sentences.
  • *Always add links or paths to your design file in your STA folder.
  • *Make it easier for your collaborators and mentors to give you feedback on a design by adding screenshots to your comment.

Notify people in Basecamp by adding the @ symbol before their names (no spaces), otherwise they may not see your comment.

@ your STA mentor in your comments when you want to:

  • ask us questions about the mechanics of using the STA blog,
  • about the mechanics of photoshop,
  • to let us know that you have completed this task,
  • or that you would like a little feedback on on your banner design

Thank you & have fun!

Filed Under: Fall 2026 – Spring 2027

  • « Previous Page
  • 1
  • 2

Copyright © 2026 · Cola Theme On Genesis Framework · WordPress · Log in