• We are STAs
    • Asha Rountree
    • Haley Ma
    • Kate Shih
    • Kyra Lee
    • Nicholas Peasley
    • Sasha Kenney
    • Shanda Horm
    • Shriya Atreya
    • Tomas Marulanda-Mesa
  • We were STAs
  • STA Presentation
    • STA Presentation 2017
    • STA Presentation 2016
  • Testimonials
  • Resources
  • Home

STA Blog

Quantum Science

August 19, 2021 By De'sha Bass-McClellan

Quantum Information Science Logo:

I was assigned to create the logo for the Quantum Information science course. I was instructed to create something that resembles quantum science.

On my first draft of the logo, I thought to use an sphere with divided sections to resemble how quantum, unlike binary, is both on and off at the same time.

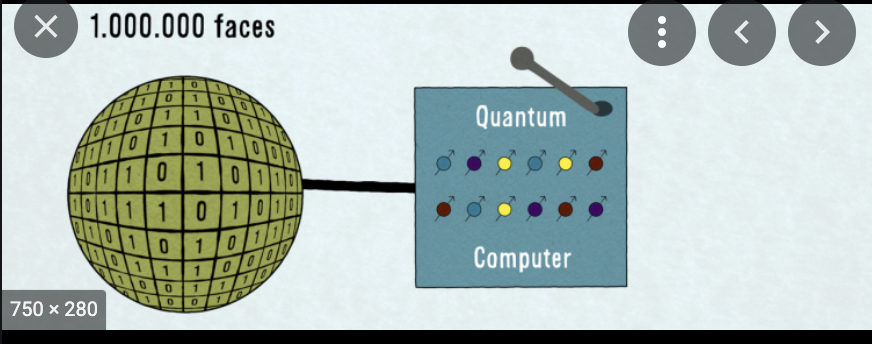
However, when this logo was reviewed, it came to my knowledge that it looks more like a disco ball. So back to the drawing board, I decided to use instead an actual atom within a circuit. This design was liked a lot and I had to make a few adjustments to the design.

Here are the different iterations and the final one at the end.


Quantum Information Science Logo Animation:

After the logo design was completed, I was given the opportunity to animate the logo!!!! I was super excited, but first I need to complete the training Automated Logical Reasoning logo.


Automated Logical Reasoning Logo Animation:

JP gave provided me with the AfterEffects template they use to create the animation for the CSMS courses. With that, I also received the AI files for the ALR logo. When I first tried to create the animation, this was the outlook.

http://sta.laits.utexas.edu/wp-content/uploads/2021/08/ALR_practive.mp4

For this one, I still didn’t have access to the UT branding or the correct font on my computer. In addition, the animation was choppy. With the proper edits, this was the final animation.

http://sta.laits.utexas.edu/wp-content/uploads/2021/08/ALR_practice_2.mp4


Back to the Quantum Animation:

Now that the practice was completed, it was time for me to work on the Quantum animation. Since I would have to cut out each frame movement individually I decided to mark out the paths first, then create the animation afterwards.

http://sta.laits.utexas.edu/wp-content/uploads/2021/08/Quantum-animation-draft.mp4


The mapping was ok but the animation was still choppy. So I added in more frames and corrected the frame rate in After Effects to 24fps. This is the final animation. Also, with the adjusted frame rate I was able to loop the animation.


http://sta.laits.utexas.edu/wp-content/uploads/2021/08/CSMS-MSDS-Quantum-Animation.mp4


Filed Under: Fall 2021 - Spring 2022, We are STAs

Typography: Use Bézier Curves to Create a Custom Wordmark in Illustrator- feedback and test run

August 19, 2021 By Abriella Corker

Typography: Use Bézier Curves to Create a Custom Wordmark in Illustrator- Feedback and Test Run


I worked on testing out the Bézier curve training Miguel had written. I decided to edit the cricket logo to have the k arm extended. Old logos have the extension but it isn’t tapered to look like an antenna which is what I did. I tried to keep it simple so that I am only focusing on adjusting curves and not trying to dress it up with shapes and what not. Below under the images I will paste what my feedback was after the training.

Read through the entire KB post and comment below some of your initial questions/comments before starting on the training assignment’s tasks.

Note: I think that for these instructions there needs to be an additional intro paragraph. Keep the one Miguel has because it is important in explaining what the curve is. We need an additional one before that to explain what we will be making, what the goals are, example images, and the software we will be using.

Does the article use subheaders to delineate new sections (background, examples, activity..)

Yes, I think the subheaders could be a bit bigger though it looks like they’re just bolded text and don’t stand out enough. The sections themselves are organized well.
For the Introduction:

Does the introduction tell the purpose of the assignment?

Not clearly enough. Maybe a statement such as “In this assignment, you will be…” at the very beginning seems like the best spot.

Does the KB post clarify what software/applications you will be using?

Yes

Does the KB post clarify what skills you will be learning/ show what final product you will be learning to create?

Yes, at the end. I think somewhere at the top once more STAs do this training it would be good to add it to the beginning with some of the best examples.

Are the clear, bullet-list goals listed out within the introduction?

No

For the Body:

Is there anything noticeably missing from the KB post?

No

At an initial glance, is the structure of the KB training easy to follow? Is there too much text- too wordy? Are there not enough pictures?

It looks ok at a glance, we will see if it is enough detail once I start on it. I usually need detailed instructions so I’ll note areas where I think it might need more if any.
If there are no issues to be addressed from your first read-through, go ahead and attempt the training assignment’s task(s). As you follow along with the instructions, note/comment any thoughts you have.

What does the KB training ask me to do? How is it testing me to apply what I have learned?

It is asking me to learn how to use curves in Ai and try applying it to a logo word mark redesign.

Are there any specific steps that are difficult to follow along with?

I think the steps are not difficult to follow. I think the issue was that there were some steps that could have been added that weren’t that would’ve been helpful. Which I will note below.

Do I broadly understand the instructions?

Yes

(If applicable) Am I provided all the necessary resources to follow this training assignment?

The extra resources provided in the training were very helpful and crucial.

After completing the training, share your final results below for the STA author to critique. Try and also provide some reflections to the trainer on your experience taking the KB training.

Do I understand the purpose and application of this training?

Yes

How long did it take to complete this training? Was this amount of time appropriate for the task?

It took me a few hours but that was all my fault. Once I found one I really liked and worked on that I feel like it would have only totaled like 2-3 hours. I did add time to my harvest for these notes as well.
Was I able to implement the new skill that I have learned AND/OR was I able to make the desired product?
Yes

Does my final product look like what the KB training is asking for? Does my final product need many changes based on feedback from the STA trainer?

Yes. No.

Is the difficulty of this training appropriate for its placement within the KB hierarchy? (Was this KB too hard/easy as an intro/required, supplemental, or optional training assignment?)

I stink at using these but I think it was easy-to medium. I think learning to use curves is a fundamental skill and this training should at least come before the logo redesign training (<—-Note for Maddy on this comment)

Personal Notes Where I see Improvements to be Made:
I think it should mention something about finding a logo to create a letter mark for at the beginning. While doing this he says just pick a letter then at the end shows it was for the tennis thing. It should go at the front.

“The best way to make a path with smooth curves is by deleting anchor points with sharp corners and using the Curvature Tool (shift + ~) to make a new curve. Note: This tool works when the selected path is incomplete (an anchor point has been deleted using the Delete Anchor Point Tool).”

– Could use more imagery here
“If you have a wordmark with repeating elements, you can duplicate them and use the Pathfinder Tool to join copies. This will guarantee consistency in the language across your wordmark. The example below shows how I created a copy of the first stem of the W and moved it over twice”
– This part can use more instructions such as how is it being copy-pasted and overlapped. How is he getting rid of the extra lines on the outside? How is he merging them into one-word mark again?
– I am struggling on this part as a new user of this training.
– I think that working in outline mode made things a lot easier. It may be good to add that note in there about it.

Filed Under: Fall 2021 - Spring 2022

Welcome

August 17, 2021 By Rahul Palla

Hi Rahul! 🙂 Welcome to the STA Blog! This the page where your blog posts will published.
Toward the end of your STA Orientation, you’ll design and upload a banner to go at the top of this page.

Upload a Blog Banner


Step One: Design Your Banner in Photoshop

Use these Photoshop specs when you’re making your banner:

  • Your banner should be 780 pixels wide (the height doesn’t matter)
    • Must include your name, your major, and your expected graduation year
    • Your banner should reflect who you are (your personality, interests or major)
    • Make sure to save your banner for the web (i.e. File > Export > Save for Web (Legacy))
    • If you save your banner as a JPG, make sure sure the quality is high (i.e. at least 60)

Step Two: Save Your Banner

  • There are two places you can save your completed projects: UT Box and the LAITS server. You’ll be given a personal folder in both locations. For now, you only have to save your banner to UT Box, but you may have to access the server at some point in the future.

Accessing UT Box

  • If you haven’t already registered with Duo,    follow the instructions here to set up an account.
    • Then log in to UT Box with your EID and password: http://utexas.box.com/
    • Go to the folder called Design-Coding-STAs, then the subfolder STA-folders
    • Find the folder with your name on it
    • Save your banner both as an image and an unmerged PSD

Accessing the LAITS server

  • Accessing the LAITS server from off-campus is slightly more complicated.
    • You’ll need to be registered with Duo if you aren’t already (you can register here).
    • Then you’ll need to connect to the UT VPN and the LAITS server. The videos below will walk you through how to do that:
      • Connect to the Server – PC
      • Connect to the Server – Mac
    •  Then navigate to your STA volume folder and save
      • smb://file.laits.utexas.edu/sta/Rahul Palla
    • Save your banner both as an image and an unmerged PSD

Step Three: Upload Your Banner to the STA Blog

  • Log in the the STA Blog here.    You should’ve received an email confirming your new WordPress account with your username and assigned password. If didn’t get it or you can’t log in, ask Suloni or another STA.
  • You’ll be able to change your password anytime by going to Users > Your Profile > Account Management > New Password.

Uploading media and banners in WP

  • Read these links before you upload your banner.
  • They will walk you through how to upload media to your blog.

How to Upload a Homepage Banner

Adding New Posts and Media

Filed Under: Fall 2021 - Spring 2022, We are STAs

What I’ve Been Up To Lately!

August 16, 2021 By Ingrid Alberding

Hello!

Last week, I worked on Cascade help requests and met with Dr. Barber to discuss changes to the British, Irish, and Empire Studies program site (formerly British Studies) and walk her through Cascade a bit.

I also worked on some small Cascade-related web support requests. No exciting screenshots for this, unfortunately. Lots of client communication and all that stuff.

Also did some photo IDs, shown below:


Also updated course graphics to reflect a change in instructor:


All that out of the way, here’s your weekly Pirate pic… my partner gave me a turntable setup for my birthday and Pirate seems to think it’s hers now


Filed Under: Fall 2021 - Spring 2022, We are STAs

Welcome to the STA Blog!

August 16, 2021 By Rachel Sacks

Hi Rachel! 🙂 Welcome to the STA Blog! This the page where your blog posts will published.
Toward the end of your STA Orientation, you’ll design and upload a banner to go at the top of this page.

Upload a Blog Banner


Step One: Design Your Banner in Photoshop

Use these Photoshop specs when you’re making your banner:

  • Your banner should be 780 pixels wide (the height doesn’t matter)
    • Must include your name, your major, and your expected graduation year
    • Your banner should reflect who you are (your personality, interests or major)
    • Make sure to save your banner for the web (i.e. File > Export > Save for Web (Legacy))
    • If you save your banner as a JPG, make sure sure the quality is high (i.e. at least 60)

Step Two: Save Your Banner

  • There are two places you can save your completed projects: UT Box and the LAITS server. You’ll be given a personal folder in both locations. For now, you only have to save your banner to UT Box, but you may have to access the server at some point in the future.

Accessing UT Box

  • If you haven’t already registered with Duo,   follow the instructions here to set up an account.
    • Then log in to UT Box with your EID and password: http://utexas.box.com/
    • Go to the folder called Design-Coding-STAs, then the subfolder STA-folders
    • Find the folder with your name on it
    • Save your banner both as an image and an unmerged PSD

Accessing the LAITS server

  • Accessing the LAITS server from off-campus is slightly more complicated.
    • You’ll need to be registered with Duo if you aren’t already (you can register here).
    • Then you’ll need to connect to the UT VPN and the LAITS server. The videos below will walk you through how to do that:
      • Connect to the Server – PC
      • Connect to the Server – Mac
    •  Then navigate to your STA volume folder and save
      • smb://file.laits.utexas.edu/sta/Rachel Sacks
    • Save your banner both as an image and an unmerged PSD

Step Three: Upload Your Banner to the STA Blog

  • Log in the the STA Blog here.   You should’ve received an email confirming your new WordPress account with your username and assigned password. If didn’t get it or you can’t log in, ask Suloni or another STA.
  • You’ll be able to change your password anytime by going to Users > Your Profile > Account Management > New Password.

Uploading media and banners in WP

  • Read these links before you upload your banner.
  • They will walk you through how to upload media to your blog.

How to Upload a Homepage Banner

Adding New Posts and Media

Filed Under: Fall 2021 - Spring 2022, We are STAs

Welcome to the STA Blog!

August 16, 2021 By Adrian McKee

Hi Adrian! 🙂 Welcome to the STA Blog! This the page where your blog posts will published.
Toward the end of your STA Orientation, you’ll design and upload a banner to go at the top of this page.

Upload a Blog Banner


Step One: Design Your Banner in Photoshop

Use these Photoshop specs when you’re making your banner:

  • Your banner should be 780 pixels wide (the height doesn’t matter)
    • Must include your name, your major, and your expected graduation year
    • Your banner should reflect who you are (your personality, interests or major)
    • Make sure to save your banner for the web (i.e. File > Export > Save for Web (Legacy))
    • If you save your banner as a JPG, make sure sure the quality is high (i.e. at least 60)

Step Two: Save Your Banner

  • There are two places you can save your completed projects: UT Box and the LAITS server. You’ll be given a personal folder in both locations. For now, you only have to save your banner to UT Box, but you may have to access the server at some point in the future.

Accessing UT Box

  • If you haven’t already registered with Duo,  follow the instructions here to set up an account.
    • Then log in to UT Box with your EID and password: http://utexas.box.com/
    • Go to the folder called Design-Coding-STAs, then the subfolder STA-folders
    • Find the folder with your name on it
    • Save your banner both as an image and an unmerged PSD

Accessing the LAITS server

  • Accessing the LAITS server from off-campus is slightly more complicated.
    • You’ll need to be registered with Duo if you aren’t already (you can register here).
    • Then you’ll need to connect to the UT VPN and the LAITS server. The videos below will walk you through how to do that:
      • Connect to the Server – PC
      • Connect to the Server – Mac
    •  Then navigate to your STA volume folder and save
      • smb://file.laits.utexas.edu/sta/Adrian McKee
    • Save your banner both as an image and an unmerged PSD

Step Three: Upload Your Banner to the STA Blog

  • Log in the the STA Blog here.  You should’ve received an email confirming your new WordPress account with your username and assigned password. If didn’t get it or you can’t log in, ask Suloni or another STA.
  • You’ll be able to change your password anytime by going to Users > Your Profile > Account Management > New Password.

Uploading media and banners in WP

  • Read these links before you upload your banner.
  • They will walk you through how to upload media to your blog.

How to Upload a Homepage Banner

Adding New Posts and Media

Filed Under: Fall 2021 - Spring 2022, We are STAs

  • « Previous Page
  • 1
  • …
  • 60
  • 61
  • 62
  • 63
  • Next Page »

link to LAITS home page

Video STA Home

© 2025 Liberal Arts Instructional Technology Services | Production Credits