Week at a Glance
This week, I continued working through training work, and was introduced to my first project.
Create Pixel Art in Illustrator
Programs: Illustrator
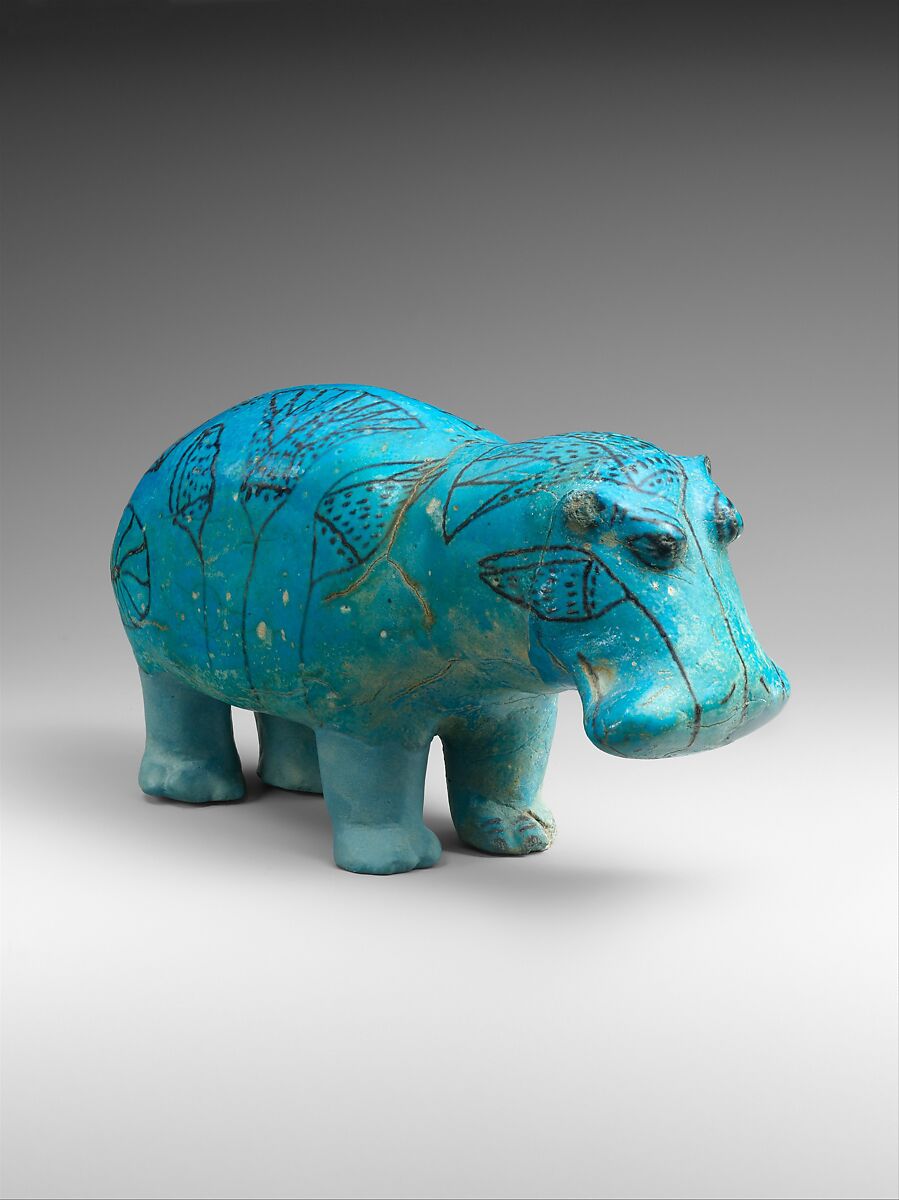
Using the KB tutorial, I created pixel art of Hippopotamus (“William”) from the Middle Kingdom, 1961-1878 BC, sourced from the MET museum website.
Using this image, I created the following iterations:
![]()
![]()
![]()
![]()
![]()
Following this project, I moved on to Learning the Principles and Elements of Design.
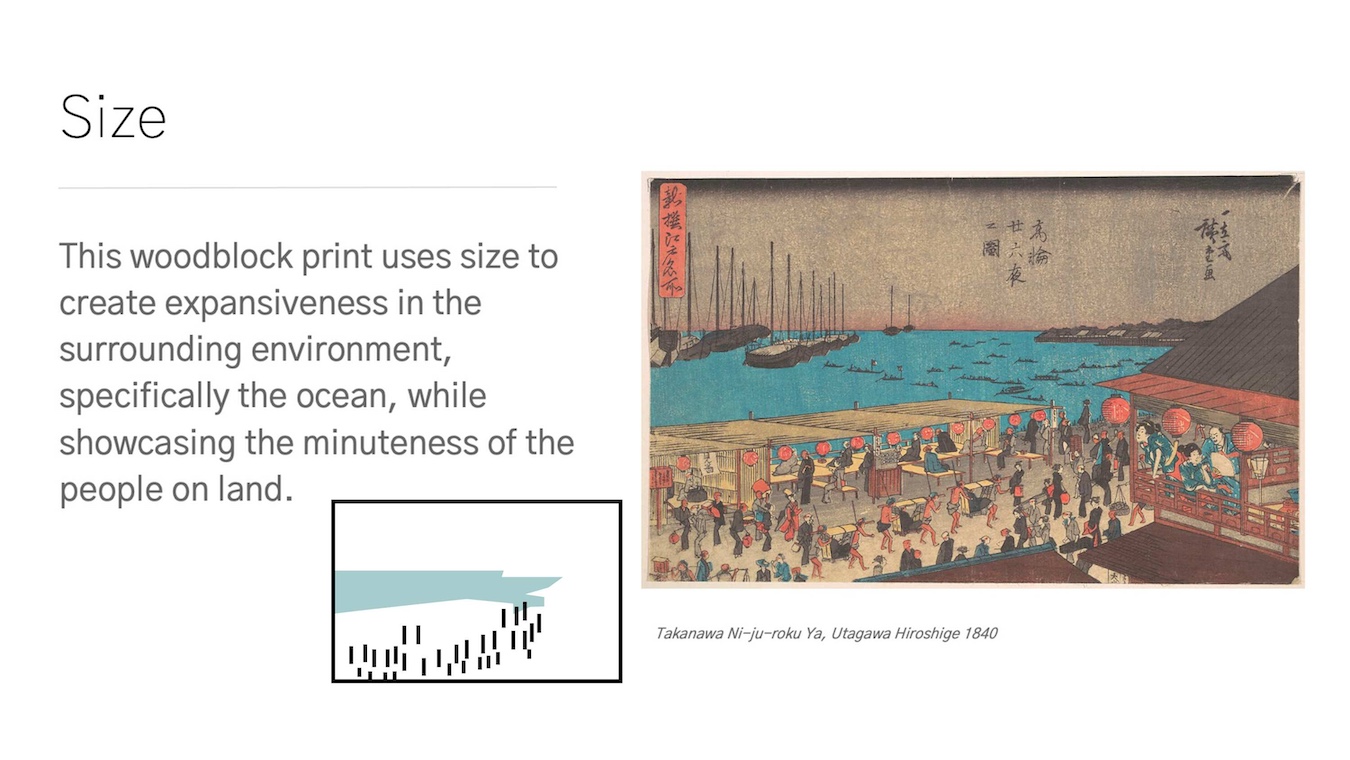
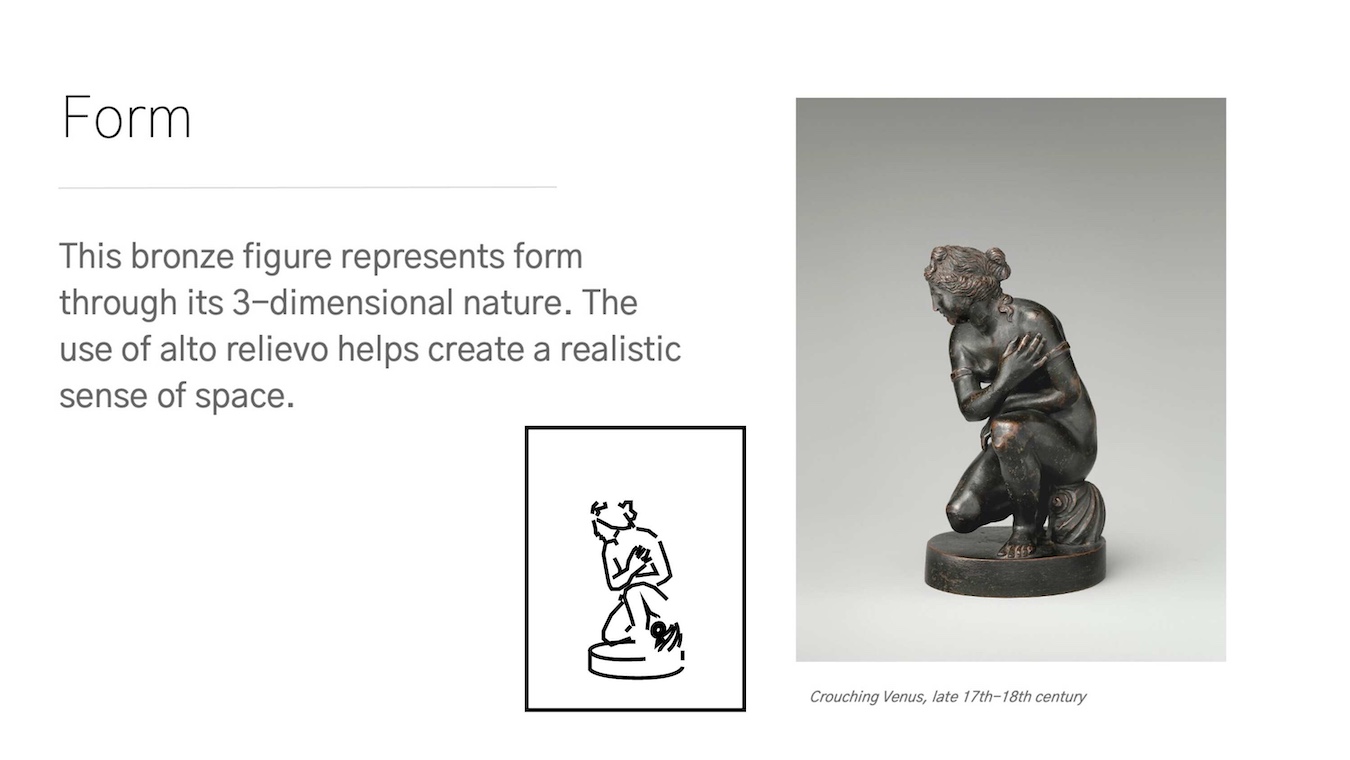
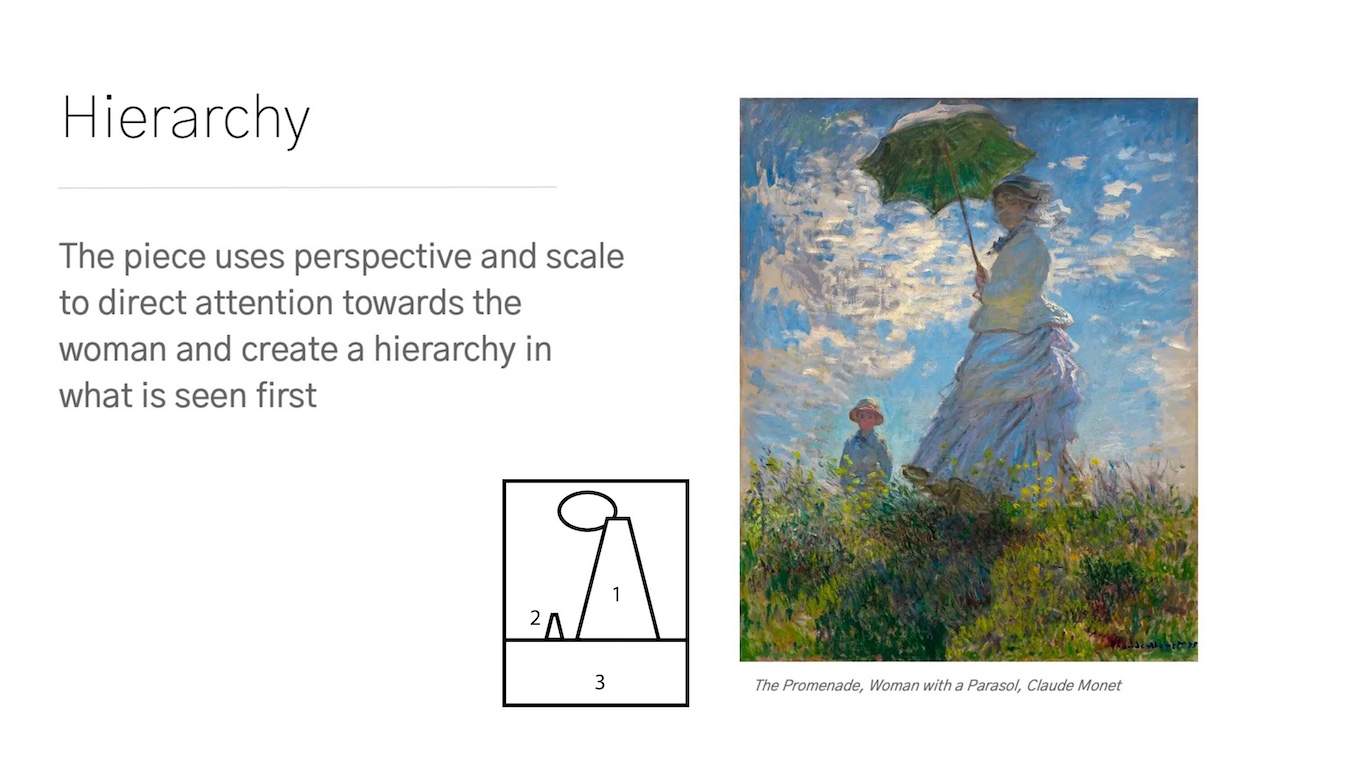
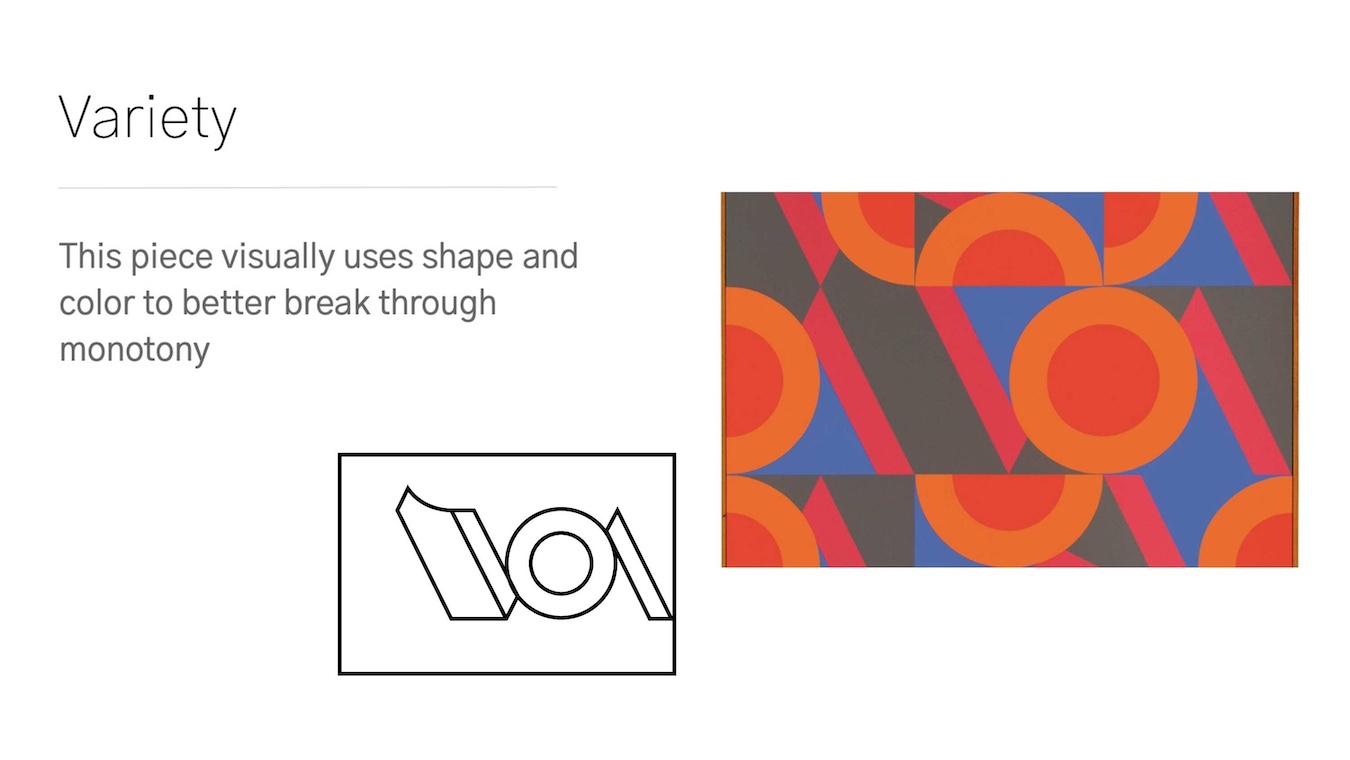
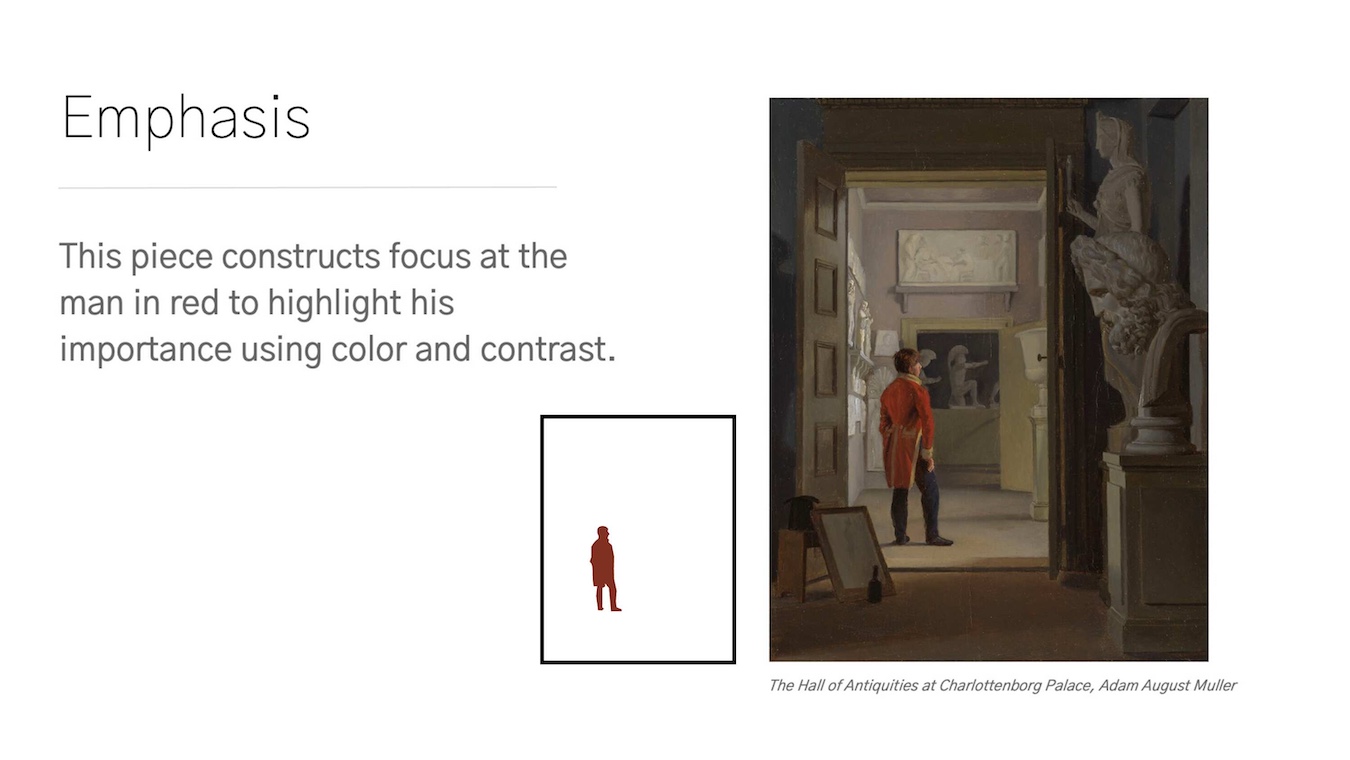
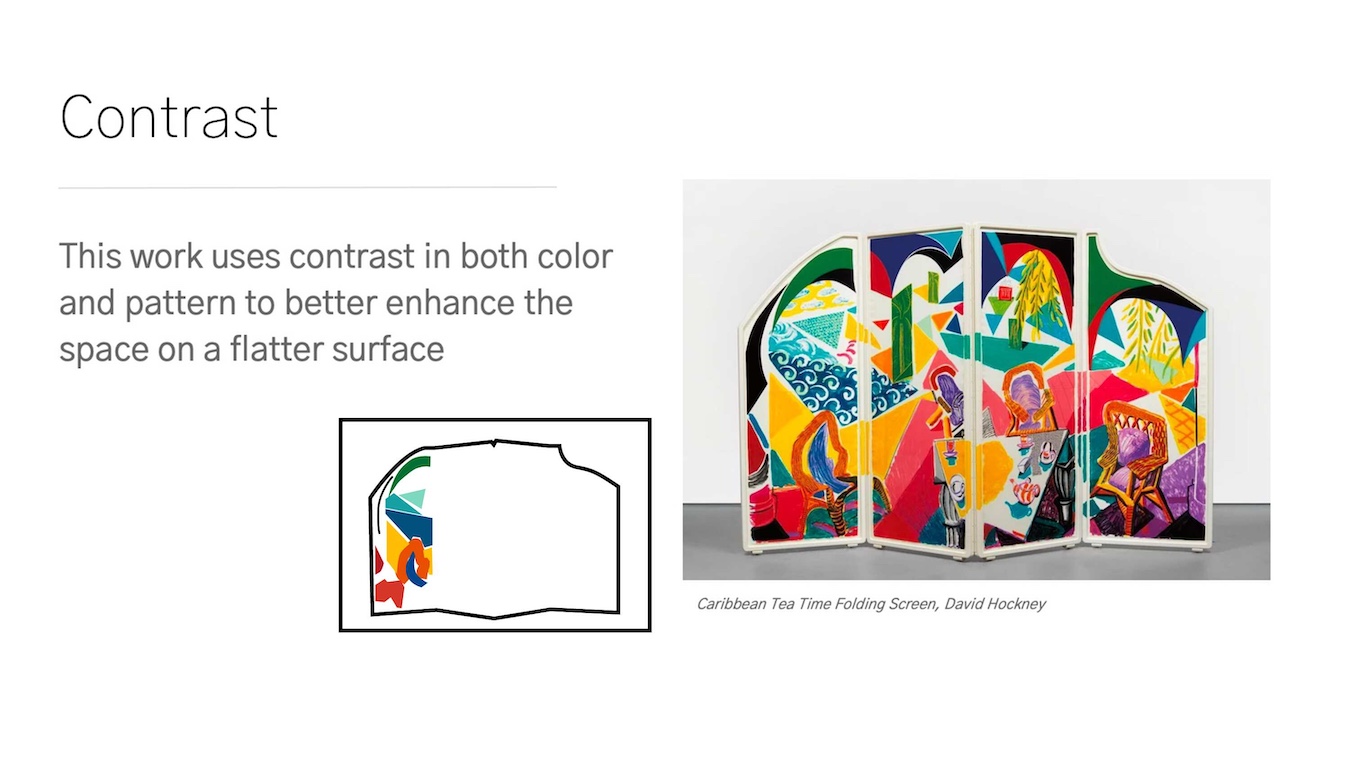
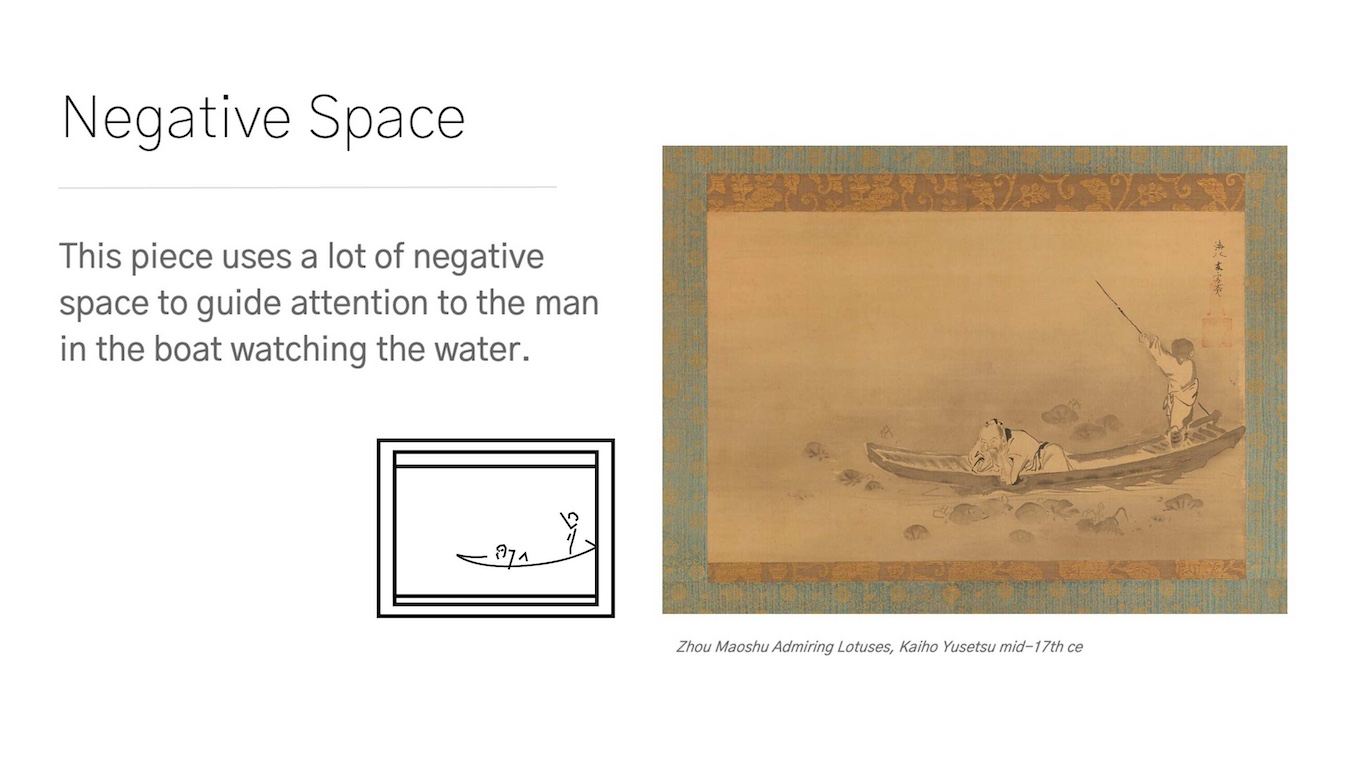
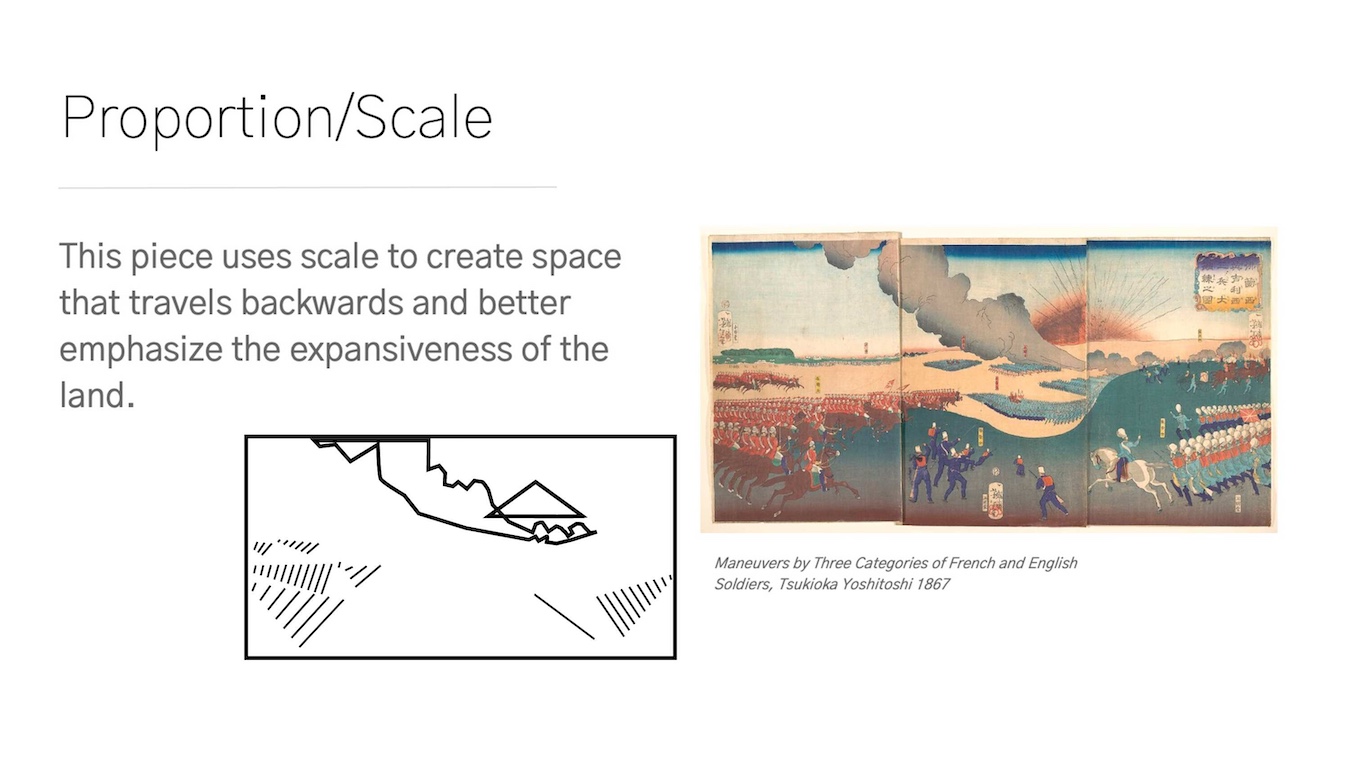
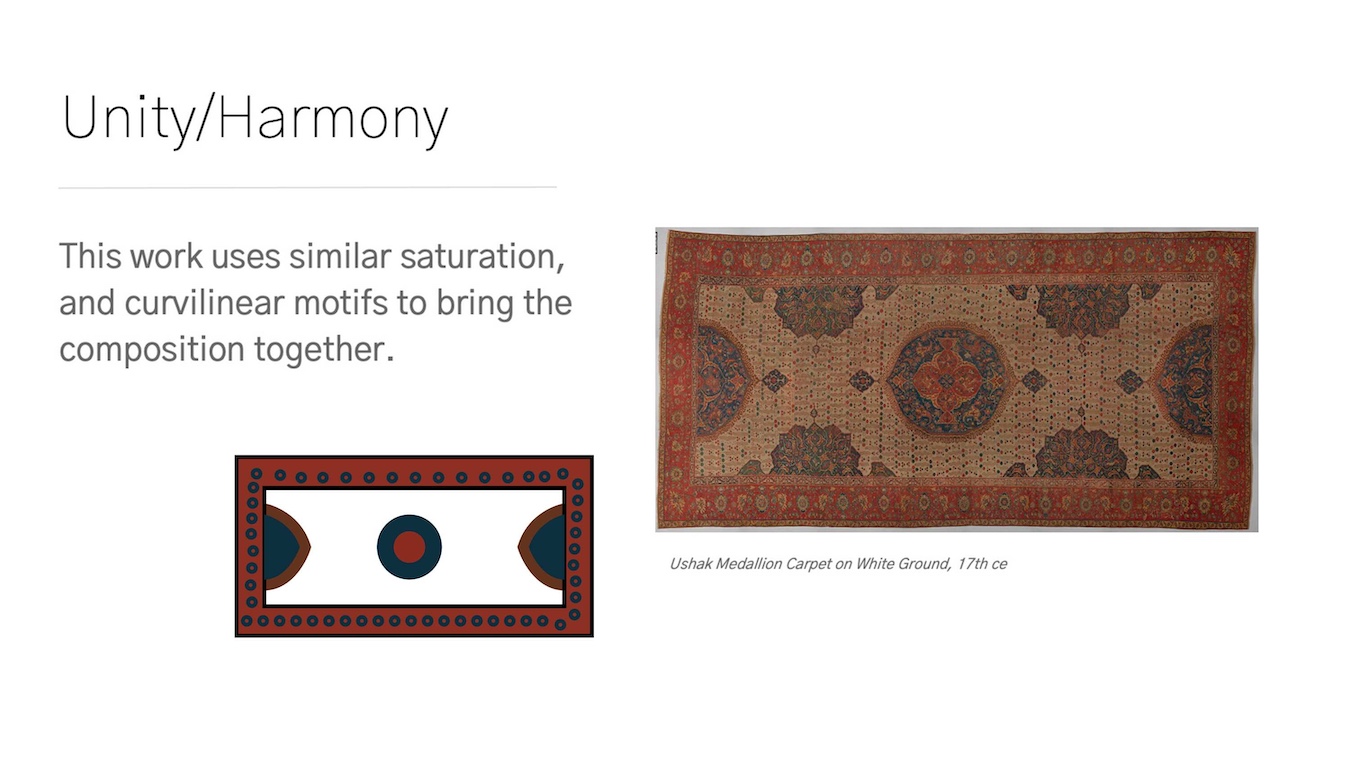
Learning the Principles and Elements of Design
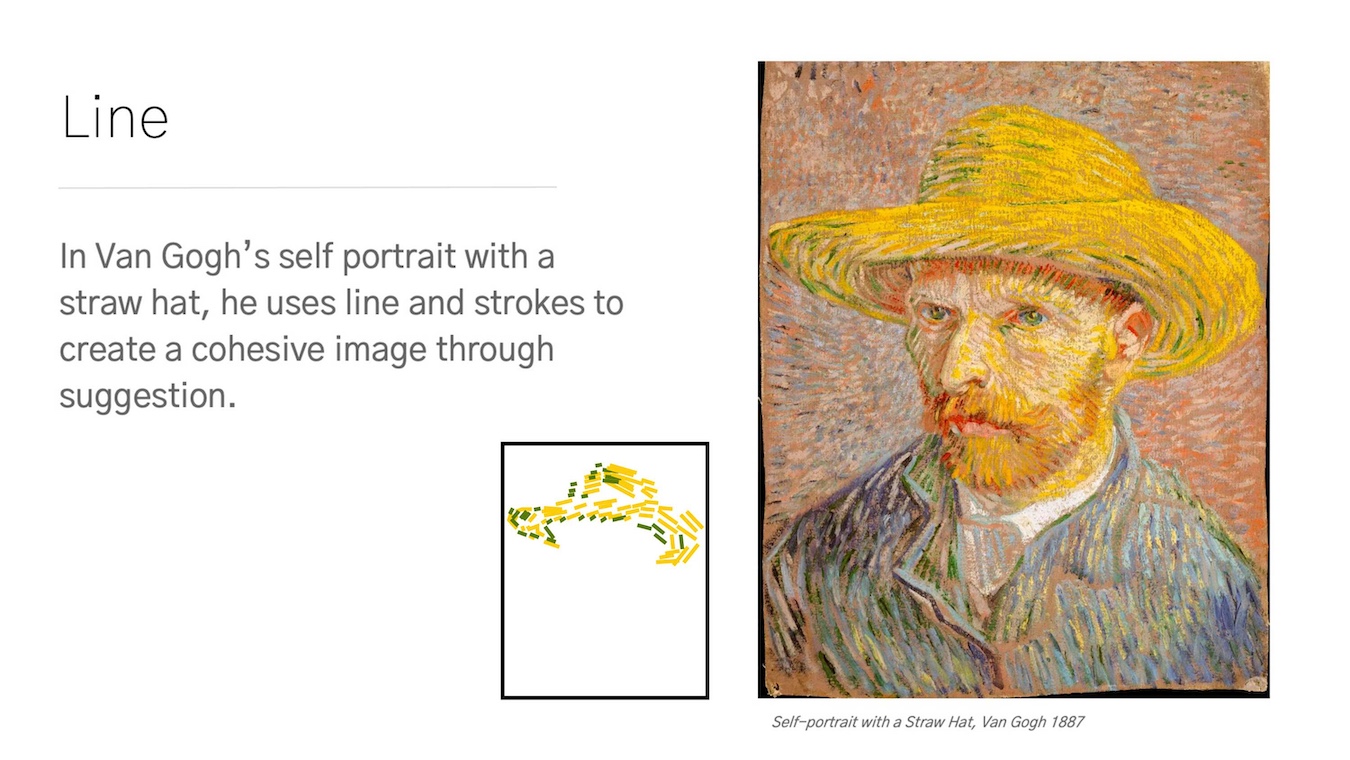
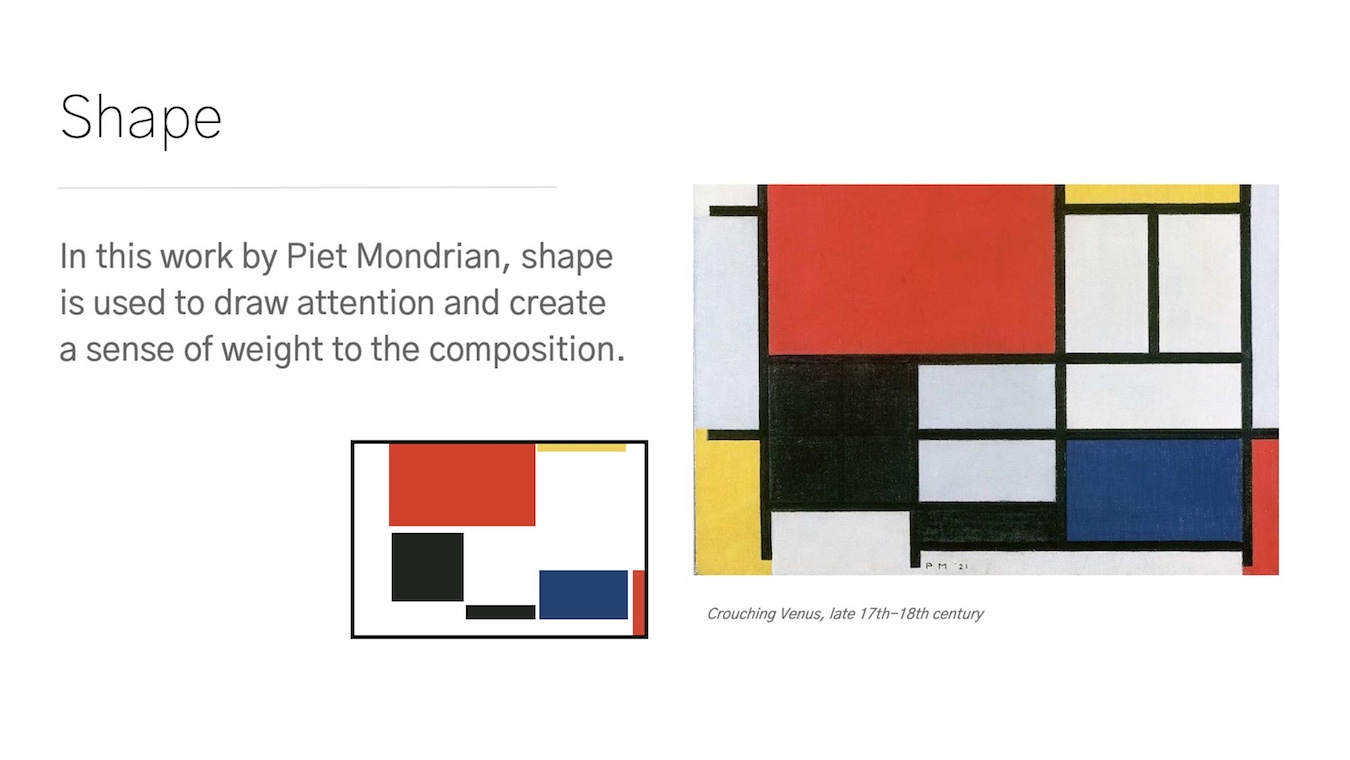
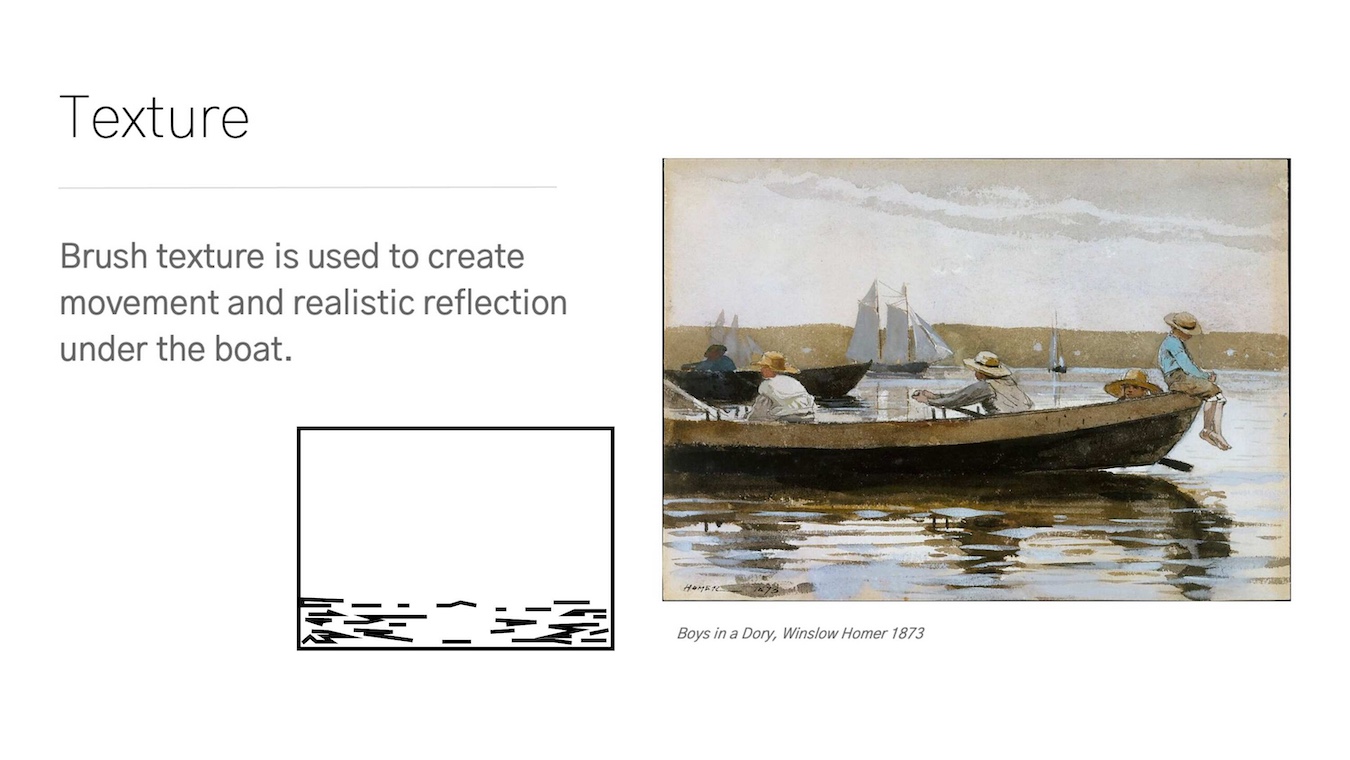
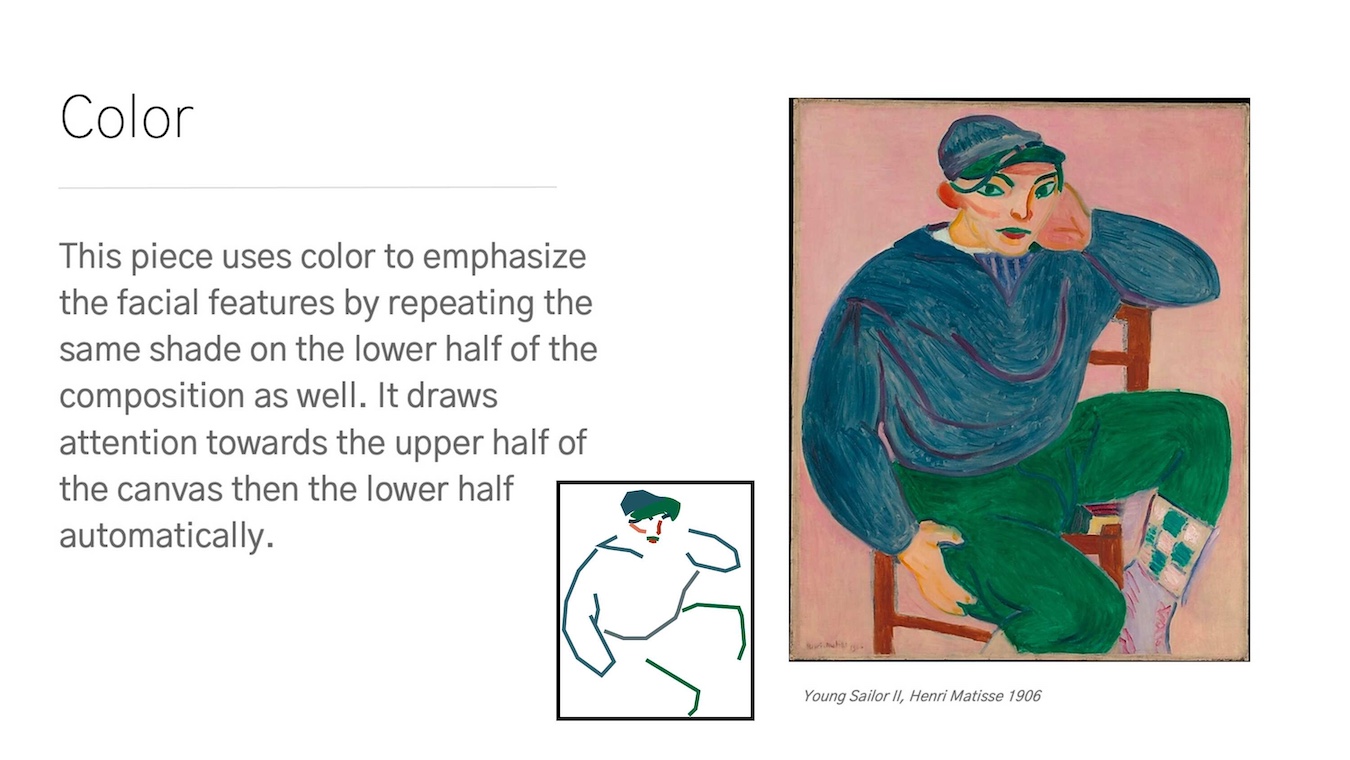
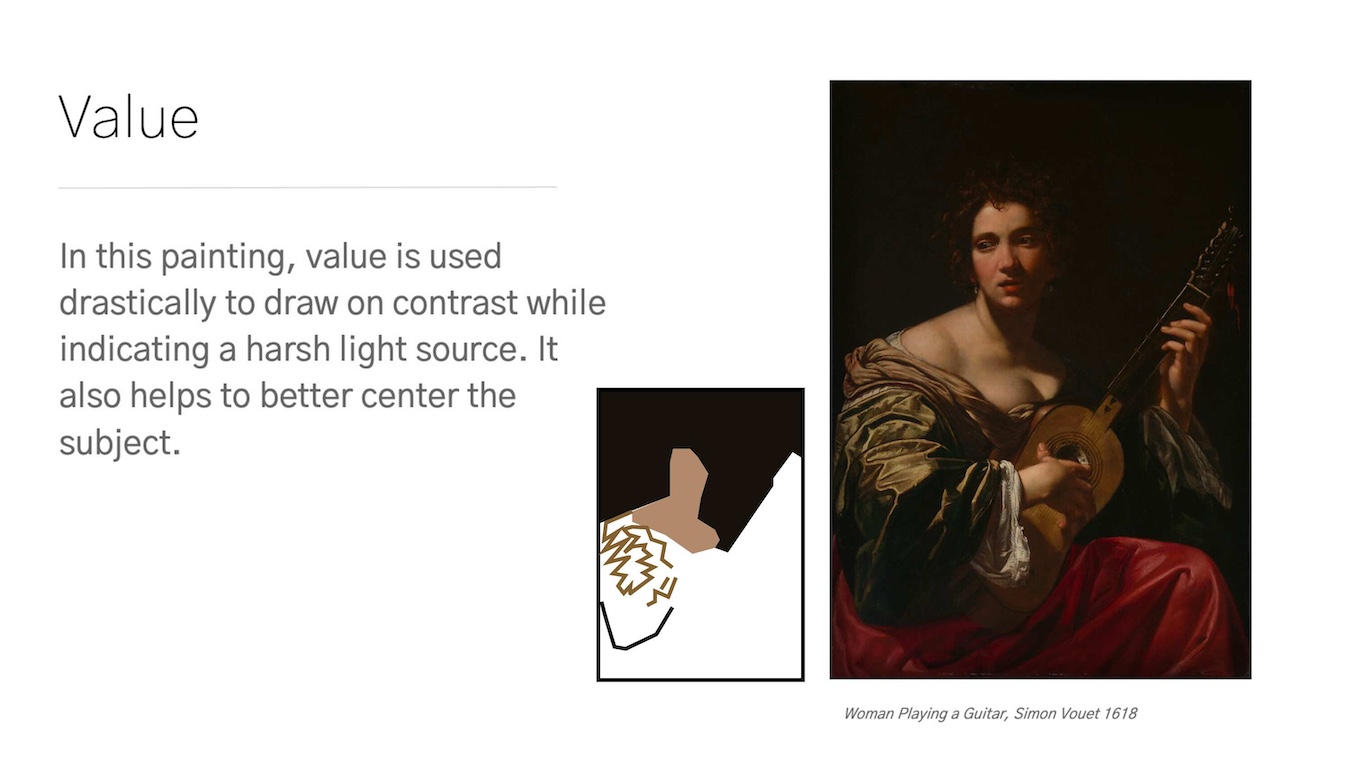
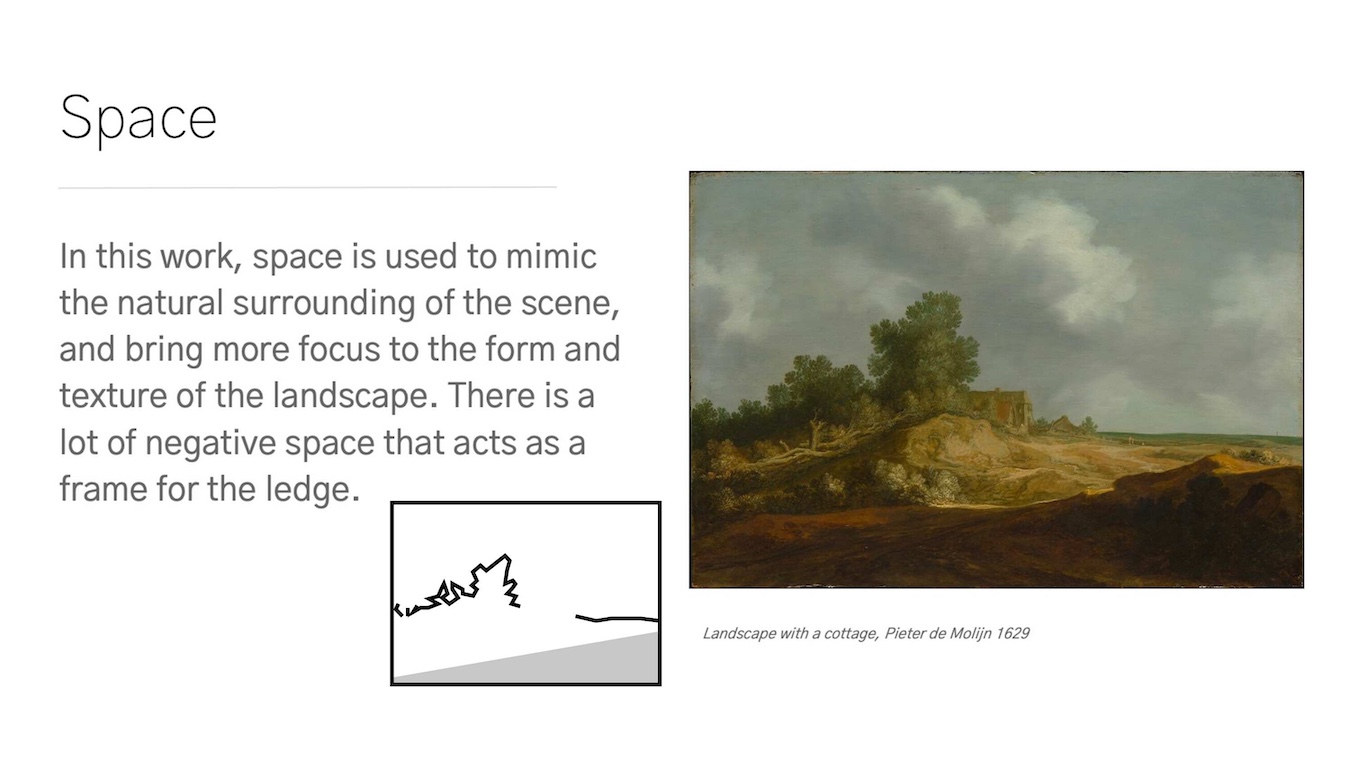
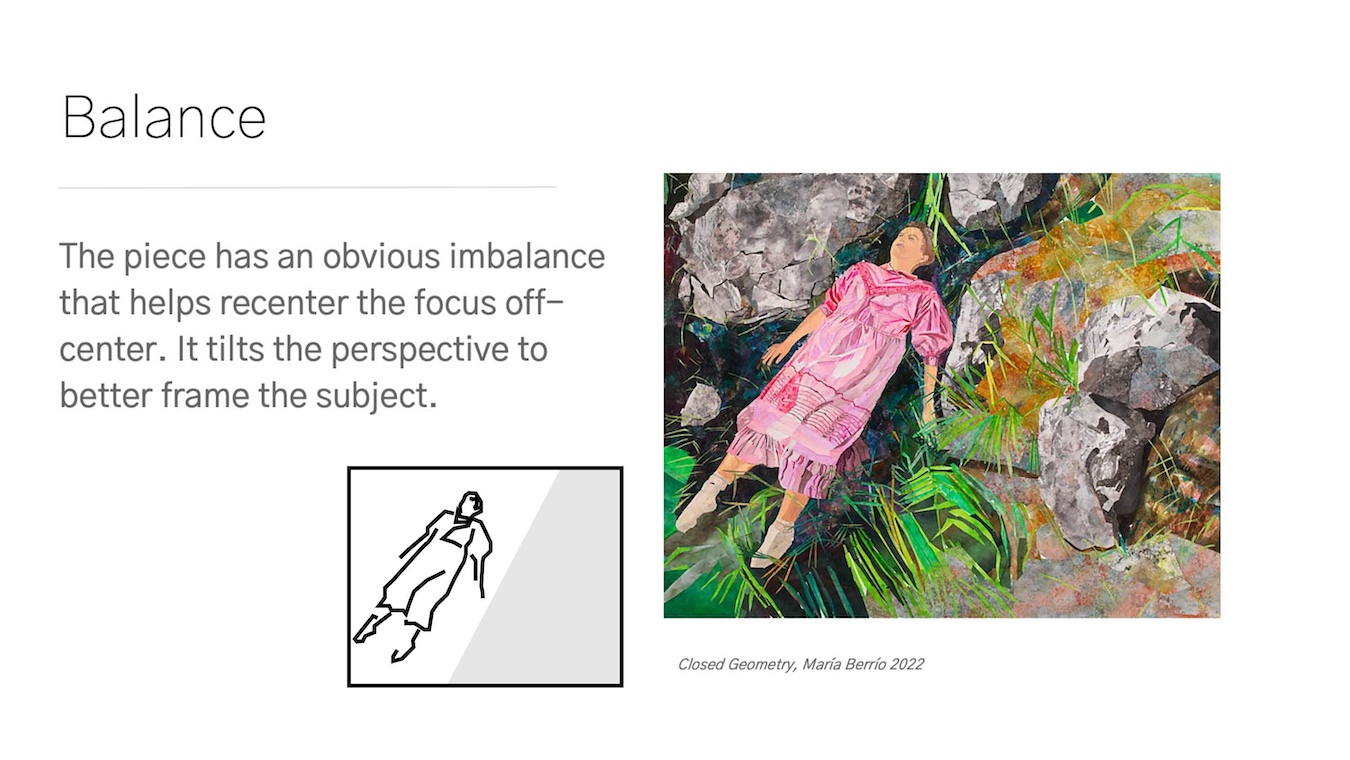
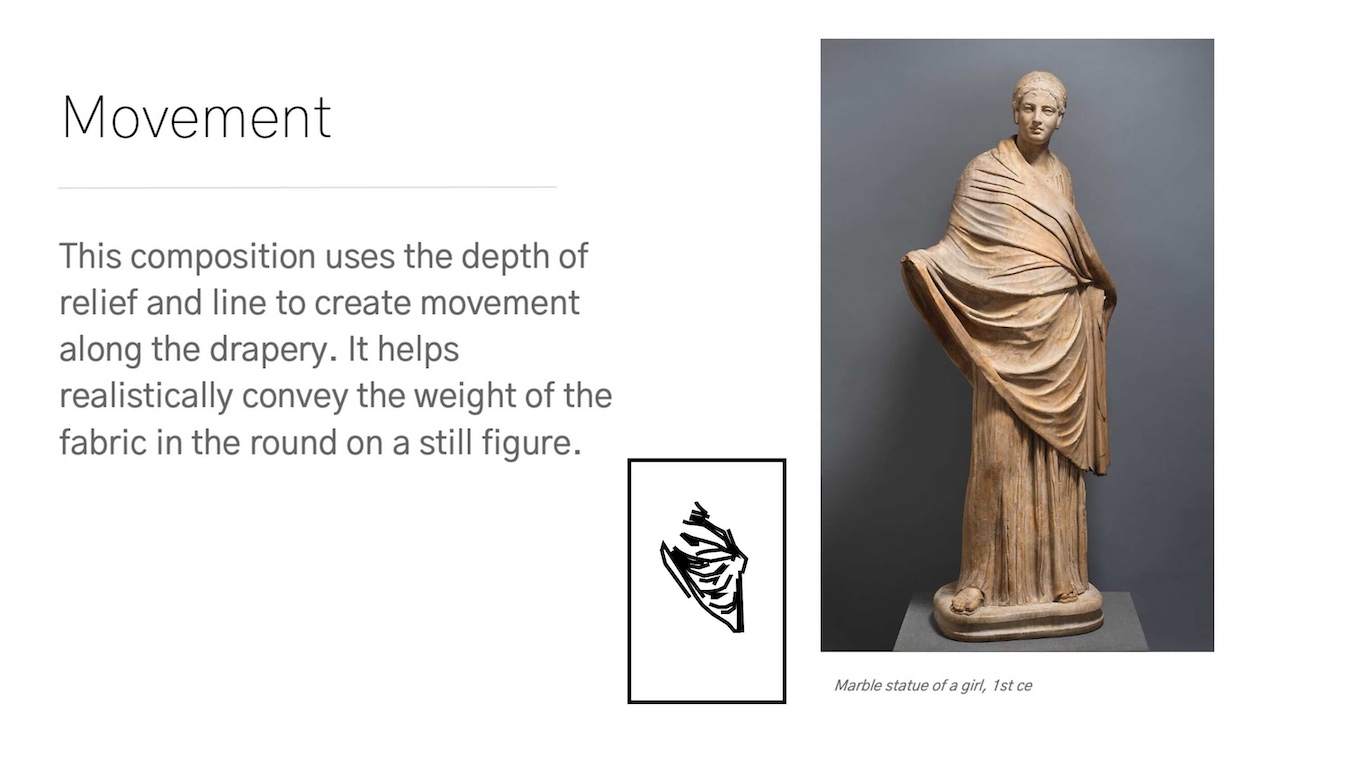
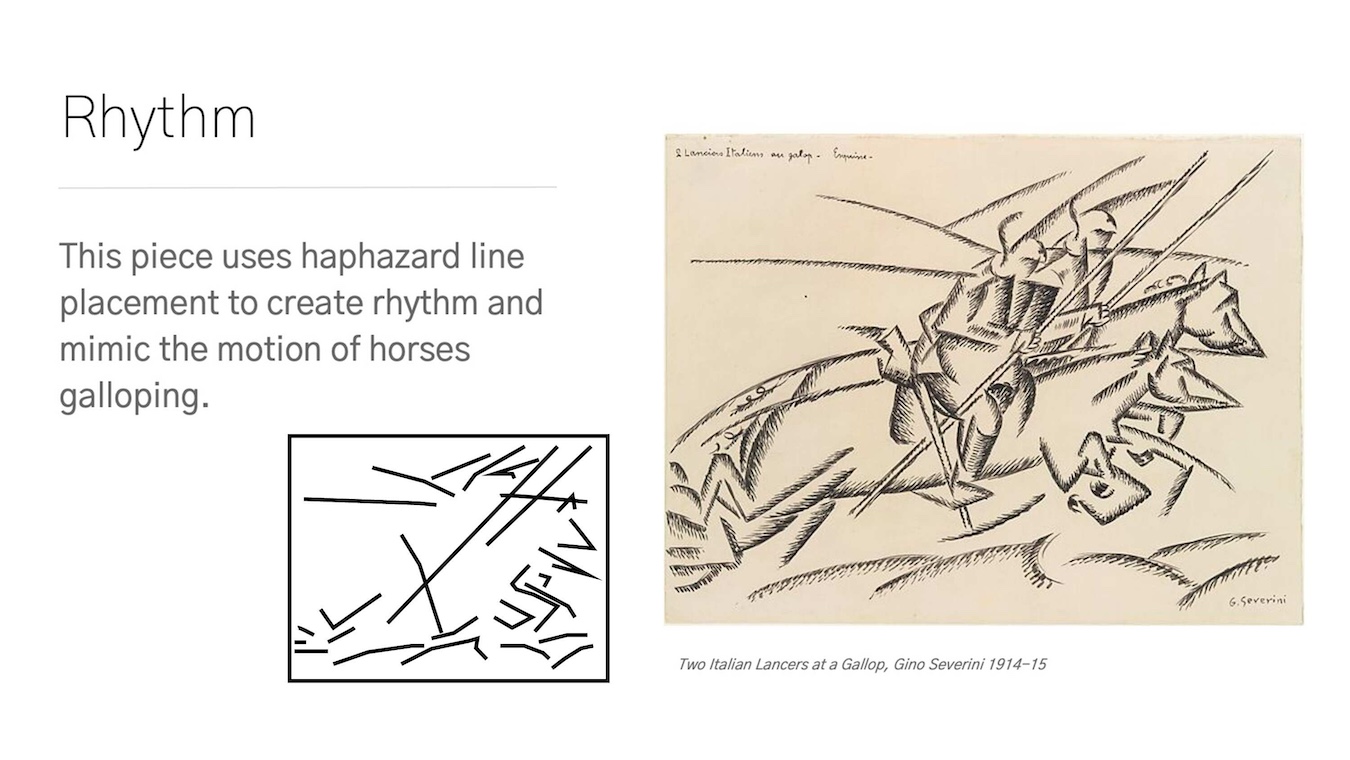
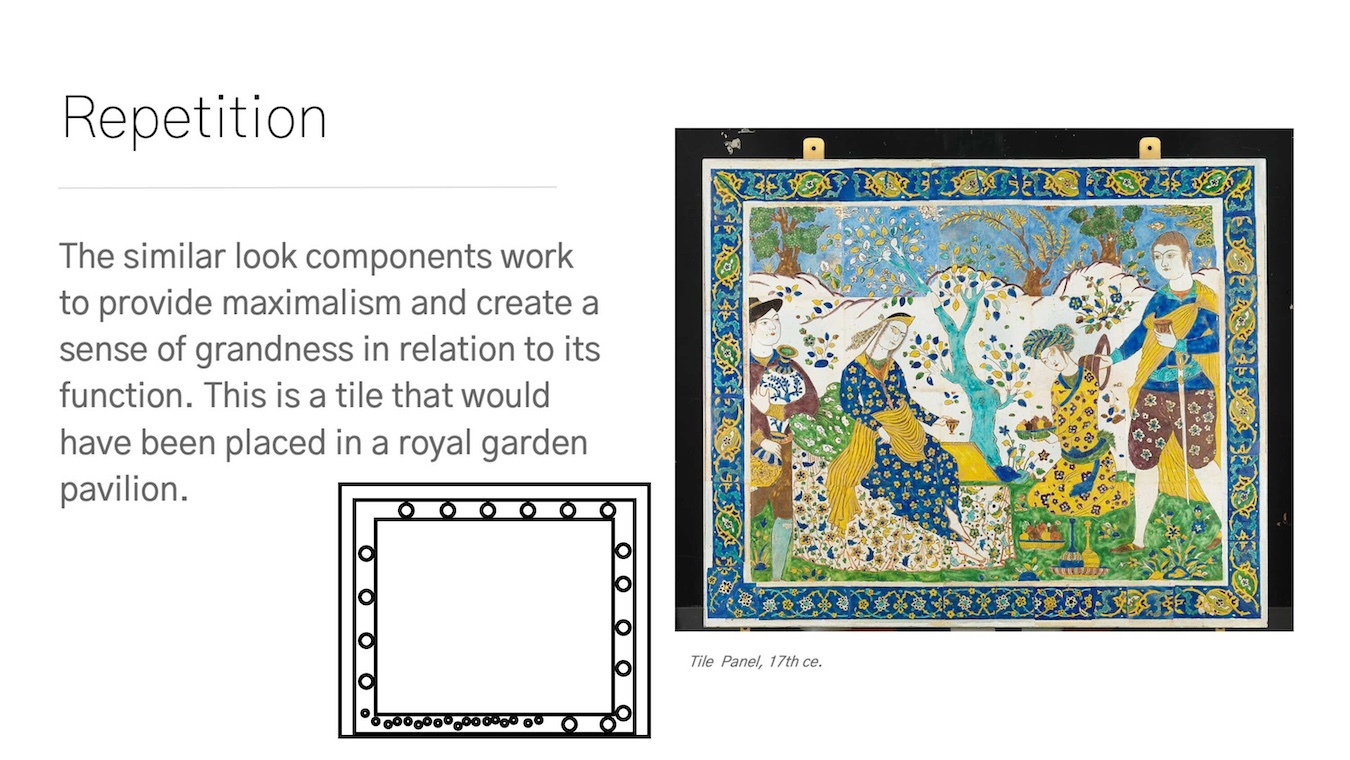
Using the KB tutorial, I created a slide deck of each design principle and element with examples pulled from famous artworks. After collecting examples, I went into Illustrator to outline the area where the principle/element is displayed.


Project Work
In between my training work, I was able to work on my first project assigned to me – 11.1B Music, Art and Theatre. Using a predetermined vocabulary list, I collected image options for each and placed them into the google sheet. I am currently still waiting on approval for the image options.