How do you emulate an art genre using Ai?(Chinese paper art)
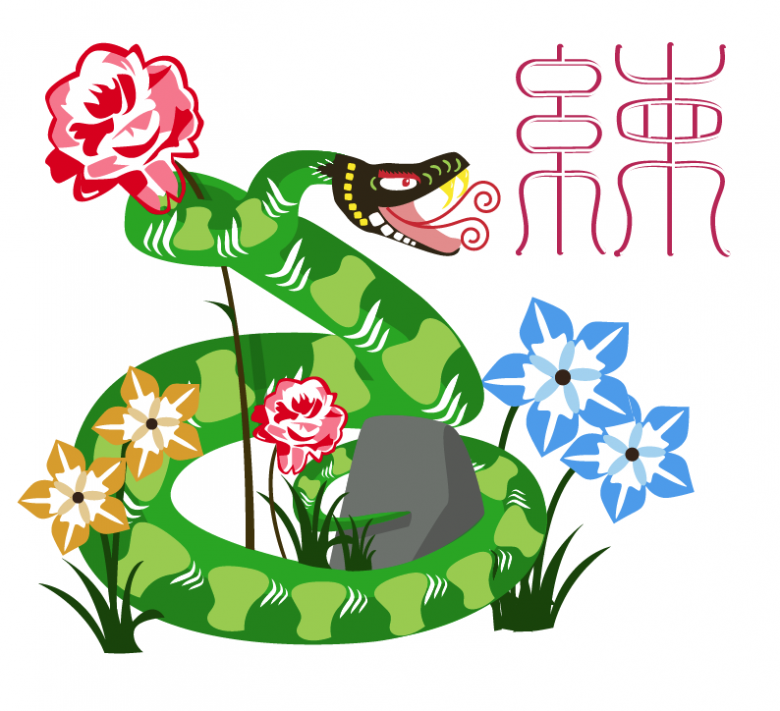
In this tutorial, we will be making a snake in Illustrator in the Chinese paper cut art style.
Here is our finished product:
This tutorial is divided up into 6 different parts.
1.Basic Shapes
2.Swirl Tool
3.Patterns
a.Head patterns
b.Body patterns
4.Using pathfinder to cut out shapes
a.Simple cut outs
b.More complicated cut outs
5.Flower cutouts
6.Additional things
BASIC SHAPES
1. Find reference pictures for your animal. I had to use two different ones because the head on one of the pictures was not as cool looking as the other one. (You can worry about your background images after your animal’s done) Lock the layer that your reference pictures are on.
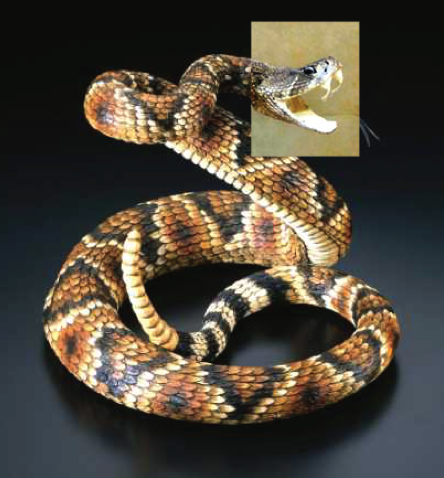
2. Make basic shapes for the snake using the pen tool. Be sure to make them closed shapes so you can fill them in with color later. In this case, I chose to make the head a different color from the rest of the body. This style of art tends to be very bright so make sure to pick out bright colors.
Aside: This project also called for the head to be detachable from the rest of the body (the animal heads were going to be used as icons for the navigation of the site). You do not need to make the head of your animal detachable.
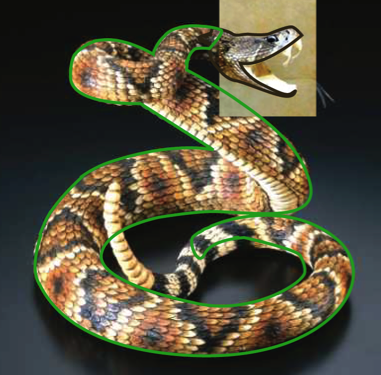
I took some liberties with his tail, just as a personal choice. Ill later wrap the end of the snakes tail around a small rock.
Tip: You can make one big shape for the base color (in this case, the light green part of the snake). However, once you get to the darker shading, those should be separate shapes.
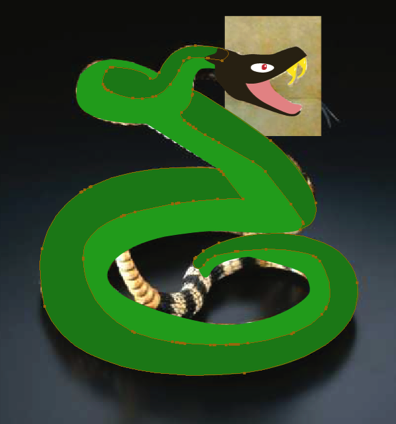
Tip: LAYERS. LAYERS. For the love of god, use layers to your advantage. Name them, divide them, organize them. Youre going to have a LOT of shapes and paths by the end of this, you dont want to waste half of your time just trying to find that one shape you made two days ago.
Tip 2: SAVE OFTEN. That can never get said enough.
SWIRL TOOL
A tool that comes in handy occasionally is the swirl tool. I used this to make the ends of the snake’s tongue. If you already know how to use the Swirl tool, feel free to skip ahead to the next section.
The swirl tool can be found with the line segment tool.
1. Pick your color for your swirl, in this case, its red for the tongue.
2. Use the pen tool (or the arc tool) to make the base of the tongue.

3. Use the swirl tool to make the tip of the tongue.
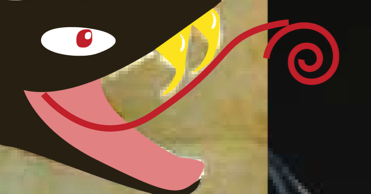
Tip: While still holding down on your mouse (or if youre using a tablet, while still keeping your pen on the tablet), use the up/down arrows on the keyboard to adjust the length of the swirl to whatever you want.
4. Rotate the swirl so that it matches up with the end of the curved line from step 2.
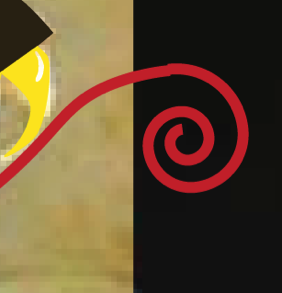
5. Not done yet! Connect the two pieces by selecting the endpoint of the curved line and the endpoint of the swirl. (Any easy way to do this is to just hit Q on the keyboard and then circle the two endpoints) Then join them together by either going to Object > Path > Join or by simply hitting Command + J .
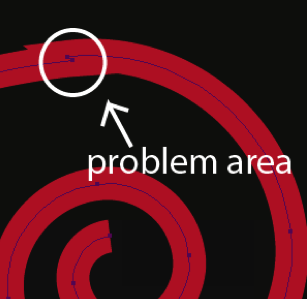
6. The point where the two pieces meet is still a little jagged. So use the Delete Anchor Point Tool (keyboard shortcut: hit the minus key) to delete one of those two endpoints you had just joined.
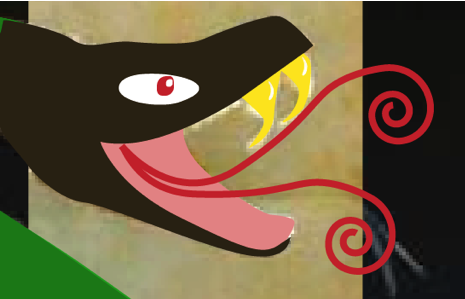
Done! Now just copy, paste, and adjust this and youve got a forked snake tongue.
PATTERNS
Patterns are a necessary part of paper art style. First I’ll start with the head.
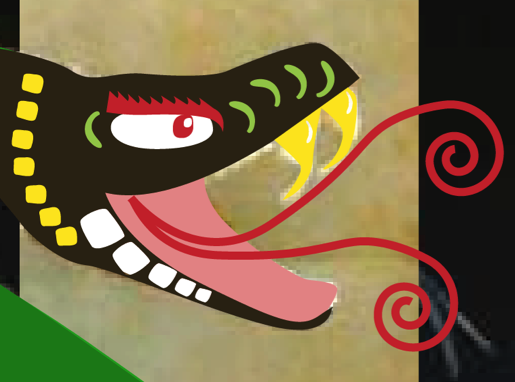
Head patterns
This part is pretty simple and flexible so Ill only have this one picture as a reference. Youll learn how to cut out all the whites shapes later in the tutorial.
1. Choose bright colors to contrast the darker colors of your animals head. White shapes will be used later for cutouts.
2. Choose and draw a shape suitable for your animal that you can repeat as a pattern.
For the head, I chose to do rounded rectangles (hand drawn with the pen tool, not made with the rounded rectangle tool). This gives the snake’s face a scale-like feel to it. If your animal is more on the furry side, your shapes should be more like fur. I also did some apostrophe type shapes just because I thought they looked good.
3. Be sure to copy and paste your shapes to make everything regular. The shapes themselves don’t need to be precise but copying and pasting the shapes repeatedly gives the illustration more structure. Keep your pattern simple. Something too intricate will not look good when repeated.
Tip: Change the size of your shape dependent on perspective. This will definitely come in handy for the snake’s body.
4. Dont forget to use both white and colored shapes.
5. Give him some angry eyebrows. (Easy way to give the eyebrows a jagged shape is to make one curvy triangle shape, copy/paste it repeatedly, then connect it all together).
Tip: Do not swamp your animal’s head with too many patterns. A little pattern goes a long way. Dont be afraid to scrap a pattern completely if it doesnt fit your animal. Look up other paper cut outs online to see what patterns they use if you need inspiration.
Body patterns
I made the pattern I did based off a snake’s scales. I actually used a separate reference picture for this one. I based my body patterns off this:
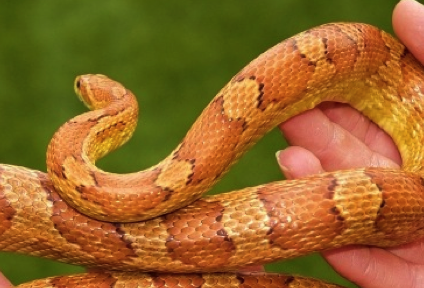
Making the pieces bigger in certain areas when the perspective is closer creates depth, just like in the reference picture.
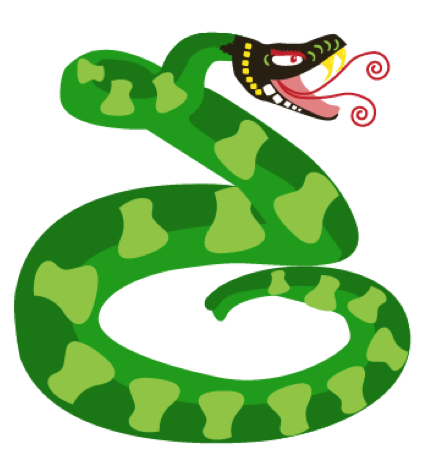
Dont forget to add white shapes for the cutouts.
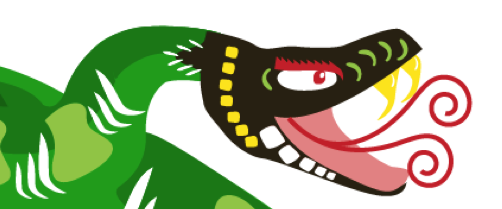
Tip: For the snake, I had to make sure the patterns followed the direction of his body. Be sure you do this too for your animal. It will make it look better and less like you just copied and pasted everything (despite the fact that thats exactly what you did).
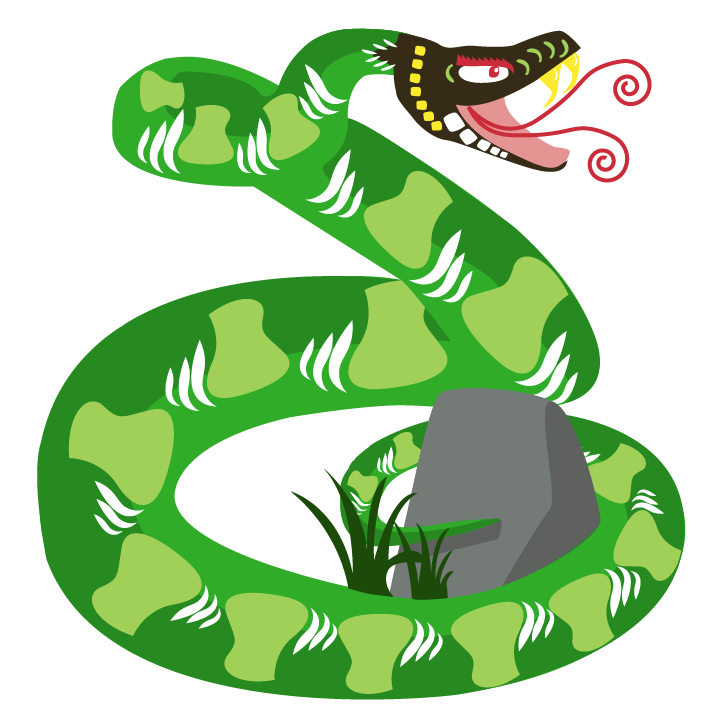
I added the rock and some grass as a personal preference.
USING PATHFINDER TO CUT OUT SHAPES
It just wouldnt be a paper cut out without actually cutting the shapes out. This part can be tedious but it helps in the long run. This section is divided into two parts.
Simple cutout: For white cutouts that have only one color/shape underneath it
Multiple cutout: For when your cutout shape is on top of two or more layers. For example, the white cutouts on the snake body: it’s on a dark green layer and a light green layer.
If you already know how to use the Minus-Front tool in Pathfinder, all you need to know is to cut the white pieces out of the main shapes so that there’s one big piece with holes in it rather than one big piece with lots of little white pieces on top of it.
Simple cutout
1. Select your white cutout shape and your background shape at the same time. You can do this by holding down both the apple key + shift, then clicking both shapes. For this Im just going to do a really simple shape.
Tip: To make things easier, make sure the white cutout shape is on the layer directly above your background layer. When there are other shapes in between, layer order gets a bit tricky.
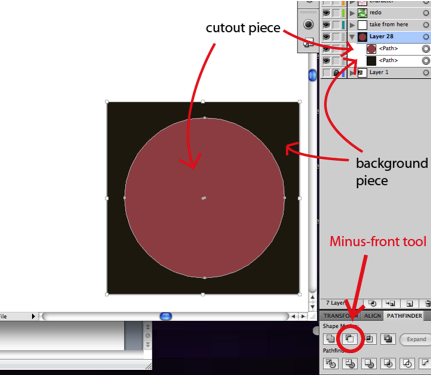
2. With both shapes still selected, open pathfinder (window>pathfinder). Click on the Minus-Front tool. This will automatically erase your white cutout from your background image, merging it into one oddly shaped image.
Here’s what it looks like after cutting out the piece (notice how its just one shape with a hole instead of two separate pieces)
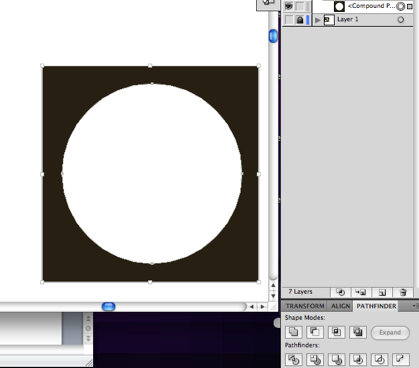
Tip: If you have multiple white cutouts, you can save time by selecting all the white shapes and the background at the same time, then using the Minus-Front tool. Much faster than tediously selecting every white shape individually.
Multiple layers underneath cutouts Snake Body
1. Duplicate your cutout. As stated before, pathfinder Minus-Front automatically gets rid of your cutout shape layer. You need this shape for both layers, so duplicate it before proceeding. You can do this by copying the shape and pasting it in front. (command+c then command+f)
2. Select one copy of your cutout and one of your background images. In this case, the dark green layer.
3. Use pathfinder Minus-Front tool.
Now the dark green layer has the cutout, but the light green layer underneath doesn’t. This is where your duplicate white piece comes in handy.
4. Select your duplicate white shape and your light green background layer at the same time.
5. Use pathfinder Minus-Front tool.
Done! Now you have a proper cutout for both green shapes.
Tip: This process can be used for cutouts on top of 3+ colors too. Basically, you need the same amount of cutouts as you do background layers.
Here’s an example of what it looks before and after cutting out the shapes:
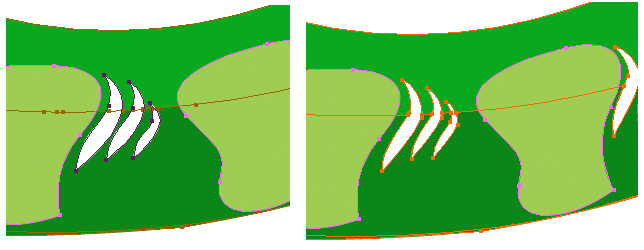
Here’s how everything looks after I added the rock and fixed the tail
>>> FLOWER CUTOUTS
Now it’s time to give a background for the animal. Find some reference pictures of flowers or plants that you think would be suitable. There are two approaches you can take with the flowers. You can either do the same method as you did with the animal (one big piece with cutouts and patterns) or you can simply make many little shapes to make the flower.
Here is the first method. I didn’t really base it off any reference pictures in particular.
1. To make the petals make one side of a petal. This will make sure everything’s symmetrical.

2. Copy this shape and paste it in front (apple+c, then apple+f). Then flip it horizontally (object > transform > relflect vertical at a 90 degree angle).
3. Move the second shape so that it lines up with the first shape, then join them together with pathfinder.
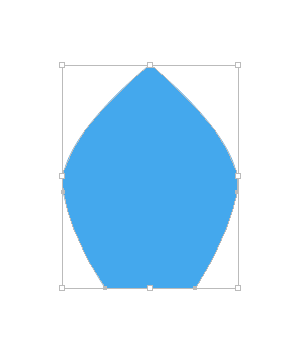
4. Copy and paste this petal, placing the shape so that it begins to form the flower like this:
Tip: I used the rotate tool and rotated each piece a multiple of 72 degrees (360 degrees divided by 5)

5. Fill in the middle piece and join all the pieces together (pathfinder tool).

6. Now it’s time to make cutouts. Here is the shape I made (using the same method I did for the petals):
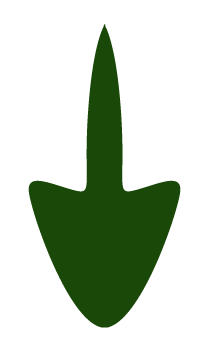
7. Repeat step 4, this time with your cutout shape.

Note: Do NOT use the minus-front tool to cut these shapes out yet! You’ll do this at the end.
8. Now add one more shape (I did ellipses) as well as a circle on top of your base shape. Feel free to pick any other shape.

9. Adjust the cutouts so that none of the dark blue is seen underneath the center pattern you just made. Move them around to make them look better.

10. Finally, cut the white shapes out of the big blue shape using the minus-front tool and you’re done!
This is the second method. Here’sthe flower I chose for this style.

1. Make an outline of flower. An easy way to do this is to make one shape outlining the whole flower, then making a copy of that shape and making it smaller. Then use what you learned with pathfinder and use the minus-front tool to delete the smaller shape to leave an outline.
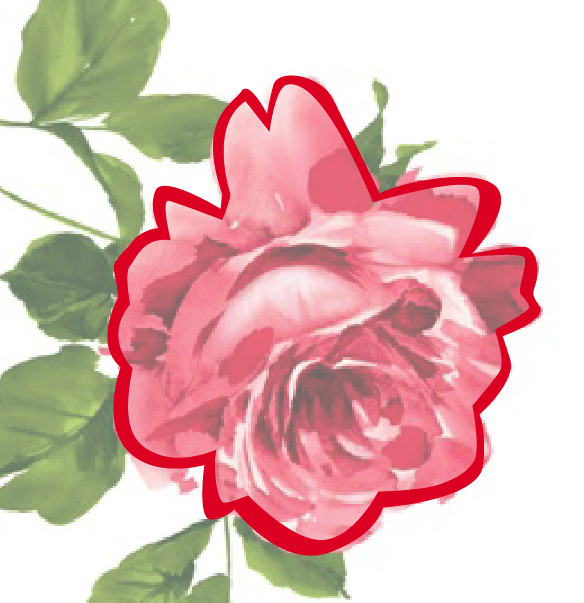
2. Start by making the darker shapes using the pen tool. You don’t have to be very precise or get every single dark shape, just enough to get the feel of the flower petals.
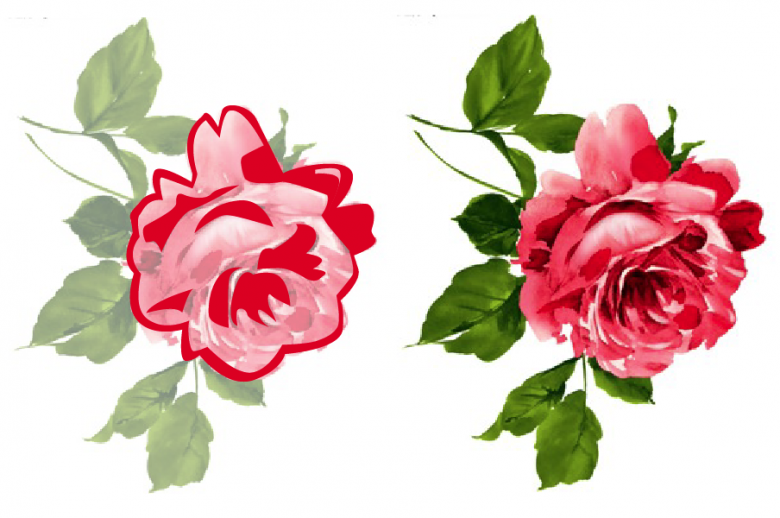
3. Then make the lighter shapes with the pen tool underneath the darker ones. Make sure to leave enough white space to make it look like a cutout.
Here’s how the finished product looks. (For reasons I can’t remember, I didn’t do the leaves)

ADDITIONAL THINGS
Youll notice my snake and the reference snake do not actually line up perfectly because I decided to throw a rock into the mix and make the snake hug it with its tail. Feel free to not follow the animal reference picture perfectly. If you think your animal would look better in a slightly different position, dont be afraid to change it.
Helpful Links
http://www.sinopaperart.com/chinese-paper-cut-gallery.htm
This website served as a reference a lot throughout this project for everyone involved. There are three different sets of the zodiac animal paper cut out art that you can look at for inspiration.