Watercolor Illustrating Method
Basics:
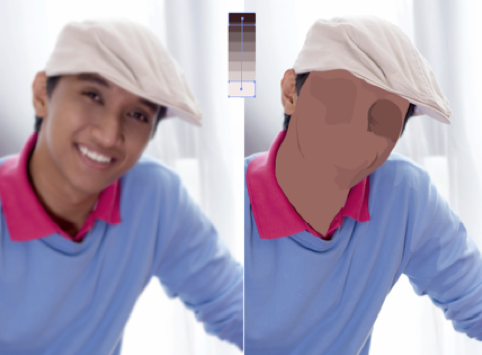
This method uses many shape paths and transparencies. The transparent layering of shapes creates the modeled surface of the subject you are drawing.
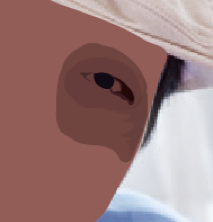
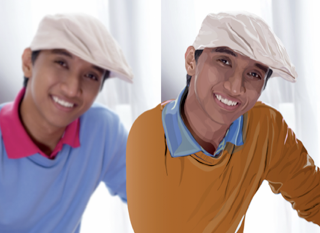
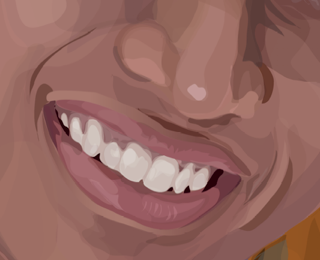
| Before and After | Close Up |
 |
 |
In this tutorial, you will learn how to…
- Observe the colors that create the dimension
- Its very important to understand how light, dark and colors create a three dimensional form. Notice where the light sources is coming from and where highlights need to be. Notice what shadows are present.
- Light sources, shadow, highlights areas directed, close up, pinpoint
- Depth and Foundation
- Like layering paint on a canvas, this watercolor effect relies on adding layers onto a base, so try to think from large to small and in terms of depth in the image.
Step 1. Identifying Major Areas:
Visualize facial divisions (ie. Eyes, nose, mouth)
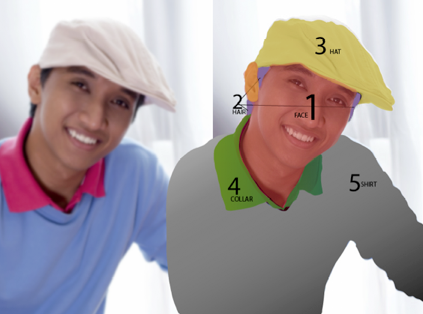
Need to direct when to add layers/paths (add screenshot of the layers. and what order you should illustrate them (name the sections by layer) use when in illustrator
Step 2. SET UP:
Photoshop
How to start:
- Open the image file you want to recreate using Photoshop.
- Duplicate the image and place it side by side on the same file
- Apply a light Gaussian Blur (Effects the tone of the images
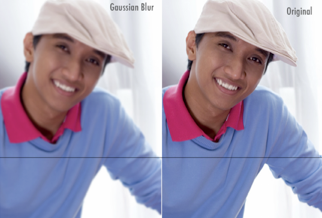
In Illustrator:
- Open both Photoshop files in Illustrator (Guassian and original image). Place the images side by side. This way you have a reference while you work on one of them
Organizing Layers
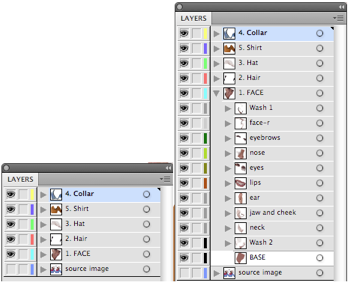
- Now name each layer with the major sections you identified during observation; hat, collar, shirt, face, hair, and source image at the bottom on the layers
Step 3. ILLUSTRATION:
You have to start somewhere, so lets start with the objects that are the foundation of the image. For instance, the face is the farthest element from the viewer in terms of depth.
#1. The Face Color
#2. Picking Color for the base path
#3. TRACING Base Path
#4. Building the face with shadow shape paths:
- Solid Color Shape Path
- Shading with a Gradient Shape Path
#5. Building the face with light shape paths
FACE:
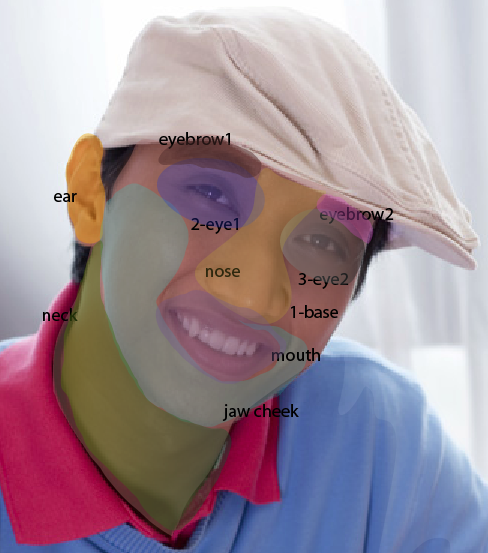
IllustrationSteps Outlined:
- Creating Color Palette
- Select Color for Base Path
- Tracing base path
- Building the face with dark shape paths (example, eye)
- Building the face with light shape paths (example, eye)
#1. The Face: Color Palette
- On the source image layer, create a path for the color pallete.
- Create a color palette form dark to light for highlights and shadows in the face that will create the dimensions on the face. (a gradient color palette)
- Color pick the darkest color of the face and create a square path using the Rectangle Tool to the side of the image you are tracing off of (doesnt matter which side)
- Color pick the lightest color of the face and create a rectangular path using the Rectangle Tool 2 inches below the dark rectangle.
- Select both dark and light rectangles by clicking on the squares while holding the shift key down.
- Go to Object>Blend>Blend Options.
- Set the options to Specified Steps: 6
- Go to Object>Blend>Make
- This should create 6 different gradient steps from light to dark. You will be color picking from this palette to create the shadows and highlights of the face.
#2. Picking a color for the base path
- Insert image of close up a show self picking color
- Color pick a base color for the face from the Gaussian Blur image. I usually try to find the color that occurs most in the face or a color that matches most of the colors.
#3. TRACING Base Path
The best place to start is with base shapes (on portraits, start with the face.) Were building this image using base shapes as a foundation for the highlight and shadow shapes.
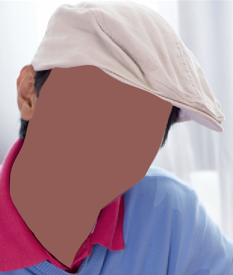
- Using the pencil tool (settings below), trace around the face using the color you picked for the base shape.
- Hide the path by clicking on the eye next to the path name. By hiding the path, you can add additional paths to the source photo without having to youre your paths around
#4. Building the face with shadow shape paths
I will be using the eye to demonstrate the water color process, which can be applied to all aspects of the illustration.
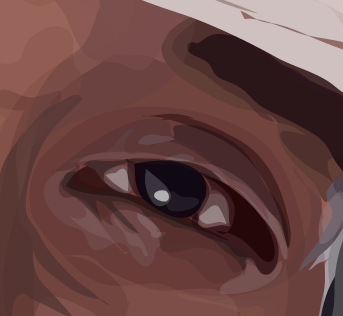
Focus on the darkest shadows in the face (around the nose, eyes, wrinkles, etc). There are two ways to approach tracing the shadows in the face. One is using the solid color shape path and two is using the gradient color shape path.
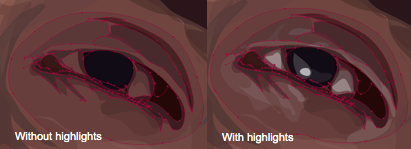
- Solid Color Shape Path
- Select a very dark color from the color palette.
- Hide the base color path so you can see the shadow you are tracing.
- Trace the shadows using the dark color you picked.
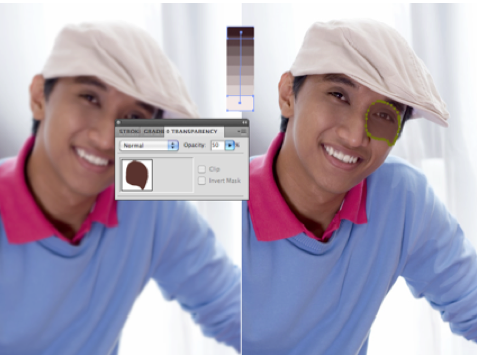
- Now adjust the transparency so it matches the shading in the area you traced
- The shapes should be deliberate and reflect the shading in that area.
- Continue tracing shadowed areas and arrange the paths one top of each other in the layer palette.
- Note the more transparent layers you add, the darker or lighter it will be
- Hide and unhide the base layer to see if the shading is correct Zoom in and out to see if the shapes work.
- FINAL(just shades)
- Shading with a Gradient Shape Path
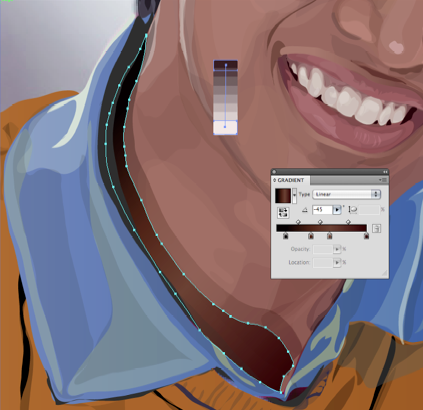
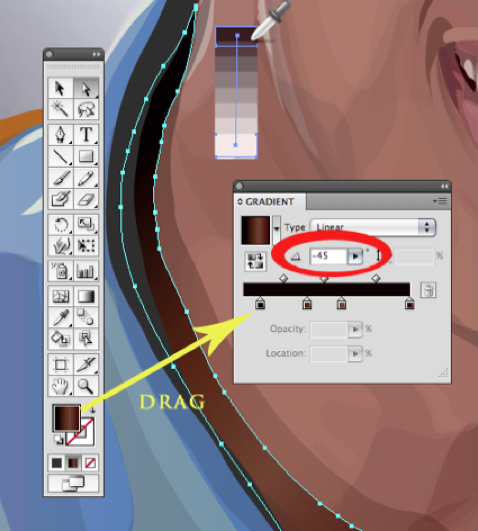
- Select a very dark color from the color palette that matches the color on the image. In this case it was black.
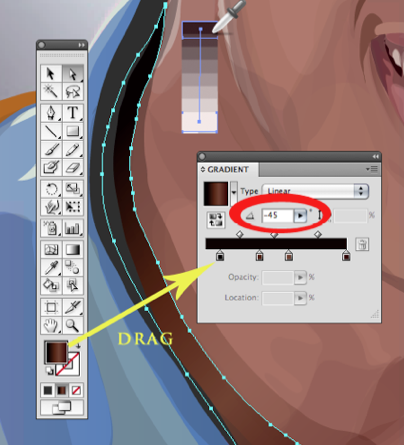
- Drag that color from the color selection area to the gradient slider.
- Select the lightest color in the area you are tracing. In this case, the lightest area can be color picked from the Gaussian Blur image or colors in our gradient color palette
- JUDGEMENT CALL: I played around with the color picker until I found a color that matched the color in the image
- Drag that color from the color selection area to the gradient slider. Adjust the slider to match the amount of dark and light color in the area you are tracing.
- Adjust the angle of the gradient to match the angle in the source image. I do this by focusing on the highlight and adjusting the gradient angle accordingly.
- Hide the base color path so you can see the shadow you are tracing.
- Trace the shadows using the dark gradient you picked.
- Tip: You can also use the transparent shape with a gradient and observe the colors that create the dimension.
- Its very important to understand how light, dark and colors create a three dimensional form. Notice where the light sources is coming from and where highlights need to be. Notice what shadows are present.
- Continue to add layers of transparencies and shapes on top of each other till you get the dimensionality of the target area.
- Close up pinpointing light sources, shadows, highlighted areas.
- Next! Creating highlights with a similar procedure to shading!
#5. Building the Face with Light Shape Paths

Focus on the highlights in the face (around the nose, eyes, wrinkles, etc). Just like shading, there are two ways to approach tracing the highlights in the face. One is using the solid color shape path and two is using the gradient color shape path.
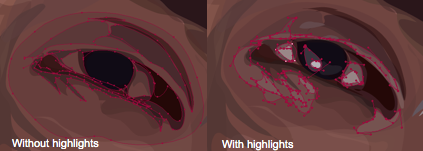
- Solid Color Shape Path
- Select a very light color from the color palette.
- Hide and Unhide the base color path so you can see the shadow you are tracing.
- Trace the highlights using the light color you picked and adjust the transparency so it matches the lighting in the area you traced.
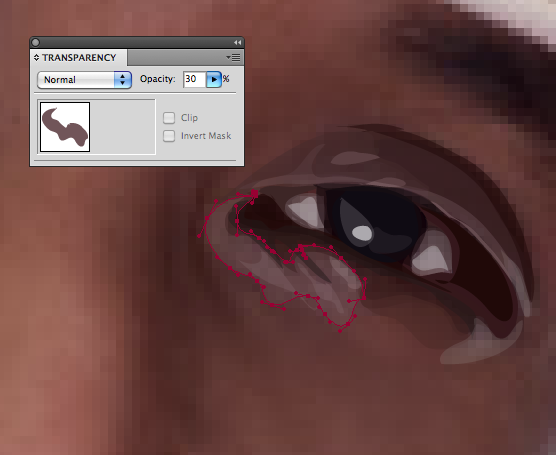
- The shapes should be deliberate and reflect the lighting in that area.
- Continue tracing highlighted areas and arrange the paths one top of each other in the layer palette.
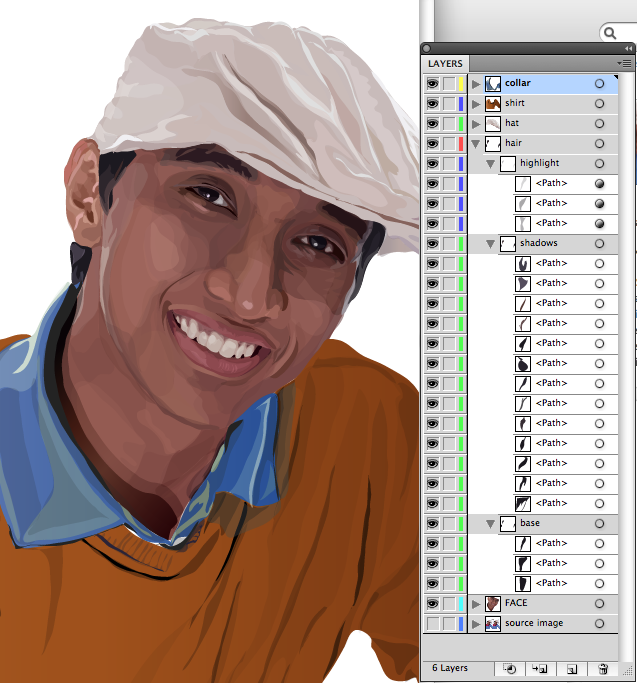
- After adding Highlights, your illustration should look like this:
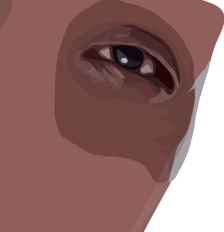
Continue this technique on the entire image you would like to illustrate. In the end your image will look something like this!

Helpful Links
(include other website(s) or tutorials
