Week 2
Training for Web Dev: Setting up WordPress, Grav and MAMP
Started on: September 12, 2022
Completed on: September 13, 2022
STA Guidance: Marianne Le
Description: After learning about the current and past projects for web developer, I learnt that the job is comprised mostly of learning about WordPress and using libraries and database supporting it. This training is about installing all of the necessary software relating to hosting and managing websites
WordPress: This is the content management system used originally for blogging and still remains the top CMS for quick and simplified blogging. Throughout the years, it grew in something much more powerful to control, design and manage your website. It can be used to host website, control users and provides a lot of plugins in giving a lot of functionalities for the users.
MAMP: This is a free, local server environment that runs on PHP language which happens to be the language that makes up WordPress and Grav that I will need to maintain and create the website.
Grav: This has similar functions like WordPress, and the only different things about it is that it is optimized for maintaining websites that do not have any database.
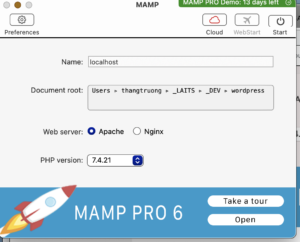
1) Installing MAMP: I installed MAMP and get the directories set up with my own local files.
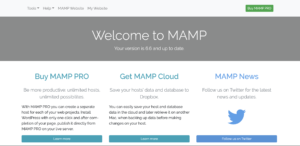
2) Setting up MAMP website: After changing the port to 5000 since I have my Jupyter set up on port 8888, I got my MAMP website set up on my local host.
3) Create Database for WordPress
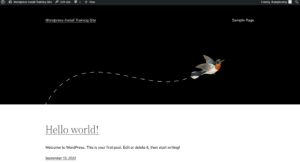
4) Launch my own website on WordPress Database. The second picture is the admin dashboard for WordPress similar to STA blog WordPress. The port link: http://localhost:5000/wp-admin/. The link for MAMP: http://localhost:5000/MAMP/?language=English The link for website of the first picture: http://localhost:5000/
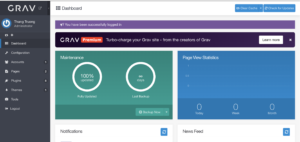
5) Installing Grav ad setting up admin account: Link for admin port: http://localhost:5000/admin Link for port: http://localhost:5000
I will include this sentence to remind me in the future of pointing at the correct file.
Remember: Every time you want to work on a project, make sure that your Document Root in MAMP is pointing to the right site. For example, if I am working on my “Grav Training Site”, it should point to my Grav-Training-Site folder.
Training: Use Gantry 5 on Grav
Started on: September 14, 2022
Completed on: September 15, 2022
STA Guidance: Marianne Le
Description: Next, I will learn how to use Gantry 5 on Grav.
- Installation of Gantry 5: I downloaded the zip file for Gantry 5 software and uploaded to Grav Tools. Usually, I can directly installed from the plugins but because of some problems on Grav, I can not isntall that way.
- After having Gantry 5 set up, I went ahead and followed through with the tutorials to modify pages.
- There are a lot of things that I can modify on Grav. It allows me to use a lot of existing templates that they called Particles which include logo/image, social, scrolling back to the top, copyright and etc.
- I can modify if there is nothing on the existing templates that can satisfy me. There are two files that I need to create so that I can modify the particles: a) example.yaml: serve as a template for particle which include all the text fields, buttons and title in which I can customize in Gentry and b) example.html.twig: basicially a HTML file which I can modify and add the corresponding particle I created in yaml file into the right place. The directory folder to add these changes is
your_root_directory/user/themes/g5_helium/layouts - To change the layout of the page with CSS file: I can create my own CSS file and attach it to this directory
your_root_directory/user/data/gantry5/themes/g5_helium/css
For the About Page, I created my own Button yaml and twig files for button. I also customize more the button with the CSS file as well.
Challenges:
- Installation of Gantry 5: For some reasons, I cannot install Gantry 5 with downloading the plugins from Grav, so I went ahead and installed directly from uploading the zip file
- Loading the image: I forgot to check the SVG file and delete the code to display the image. Better be careful next time!
The end result for my Gantry Training with two pages: Home and About Page:
I changed the color with custom CSS file and here is the update.
Training: Website 101
Started on: September 19, 2022
Completed on: September 19, 2022
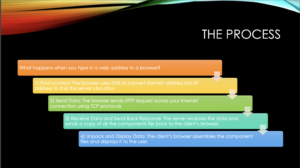
Description: I learn about the basics of website including Domain Name System (DNS), Transmission Control Protocol and Internet Protocol (TCP), Hypertext Transfer Protocol (HTTP) and Content Management Systems (CMS).
Basically, there are 4 simple steps involved at the minute you type in a domain name into your browser.
- Find the server’s location: The Domain Name System will convert domain name into IP address and locate the server.
- Send the data: After establishing a server connection, the browser will try to communicate with the server by sending HTTP request on TCP protocol.
- Receive the data and Send back the response: The server receives and approves the data. After that, the server will send back the response to the browser.
- Unpack the data and Display: After receiving the server’s package, the browser will assemble the component file (HTML, CSS/ JavaScript) and assets (Images, Buttons, Videos) and display the file on to the user’s device.
